This guide explains a new feature that allows you to use webhooks to automate actions based on events that happen within the platform.
Note: this functionality requires a Grow or Scale plan.
Video Introduction to Webhooks
Video Guide to Use Webhooks
Written Guide to Use Webhooks
Webhooks allow your platform to connect to other applications, and automate tasks. For example, we could use this to post a Tweet every time a new job is posted. Or we could add someone’s info to our Salesforce CRM every time a new user registers.
Webhooks are communications that get sent out every time something happens on the platform. For example, we could create a webhook to send a communication every time a job is posted. Current webhook events include:
=> Freelancer registers
=> Customer registers
=> Job is posted
=> Freelancer applies for a job
In addition, as part of being on the Grow or Scale plan, if there are any other events that you need, we commit to creating them.
Then, we can use a tool like Zapier or IFTTT to listen to those communications, and then take an action in another application.
Here are some examples of automations you may be interested in creating:
- Share new jobs on social media
- Record new users on Google Sheets / Airtable / Salesforce / other CRM
- Send jobs via SMS to everyone in a category
- Add new job info to a Mailchimp email template
- Email new users, or users ending a job a link to a Google Forms / Typeform form
- Create a task on Trello for your team to onboard a user / promote a job
- Send welcome emails to new users
- Send emails / Slack notifications / SMS messages to admin when a new job is posted
9 . Send an invoice / payment link to clients after a job is posted, or a milestone is completed - Send Calendly invites to new users
- Send Linkedin invites to new users via Dux-Soup
- Send new users a link to sign advanced terms and conditions
Of course, with 5,000+ applications, the sky’s the limit here.
Video Guide to Creating Webhooks
Written Guide to Creating Webhooks
Step 1: Set up a webhook listener on Zapier:
1. Create your Zapier.com account and buy a business subscription
2. Create a new Zap here
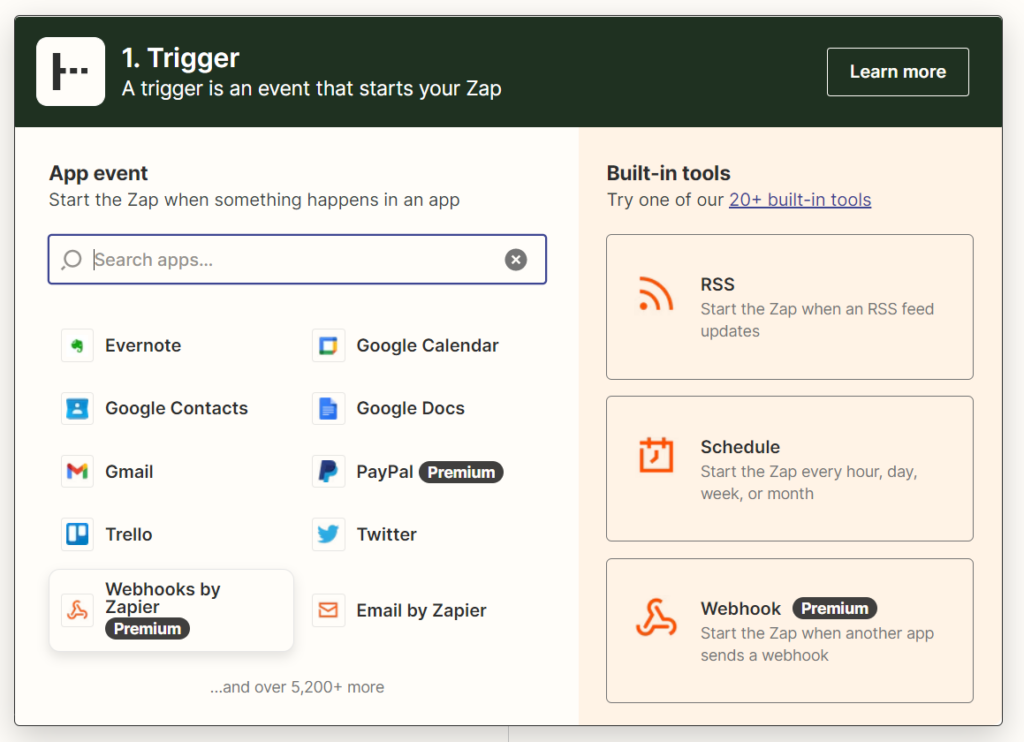
3. Select ‘Webhooks by Zapier’ as the Trigger point
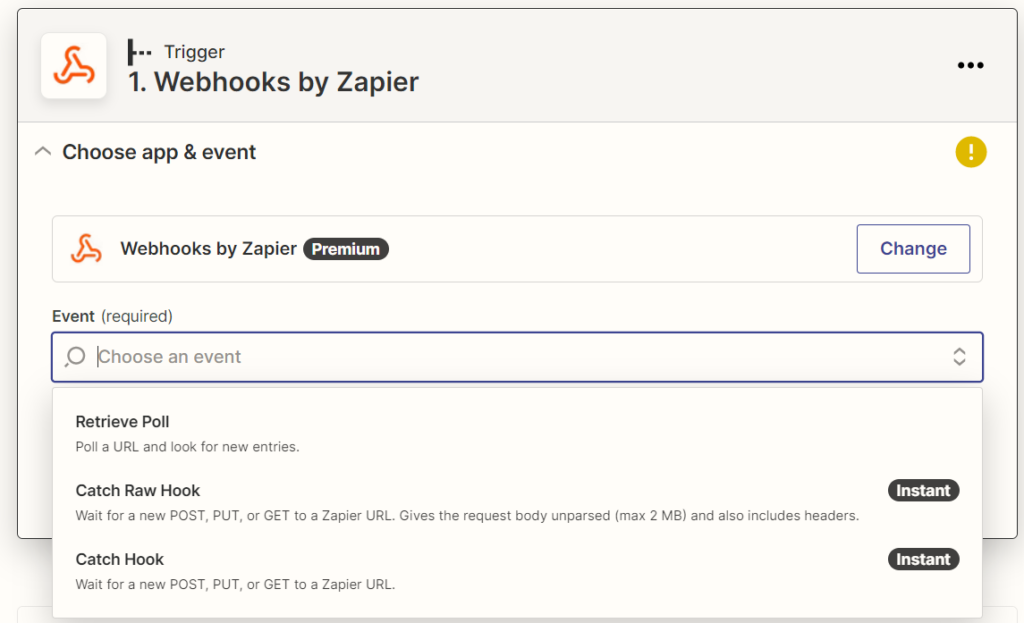
4. Within ‘Events’, select ‘Catch Raw Hook and click ‘Continue’:
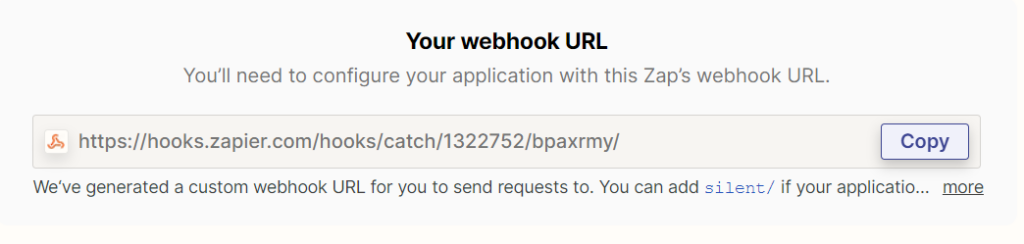
5. Copy the webhook URL:
Step 2: Set up a Webhook on TalentPools
1. Go to the admin dashboard ‘Webhooks’ tab
2. Click ‘Add Endpoint’

3. In the ‘Endpoint URL’ field, paste in the URL you copied from Zapier:

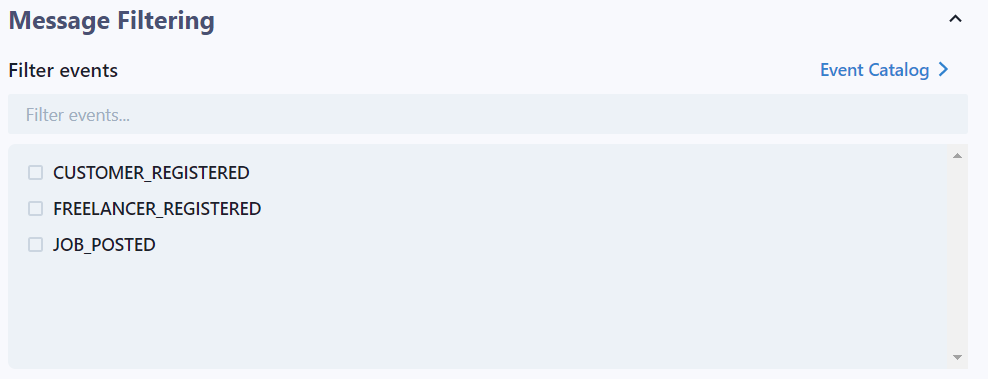
4. Scroll down to the ‘message filtering’ section and select all events that you want the webhook to send data on (you will probably want to create one webhook per event for easy organisation):
5. Click ‘Create’ at the bottom:
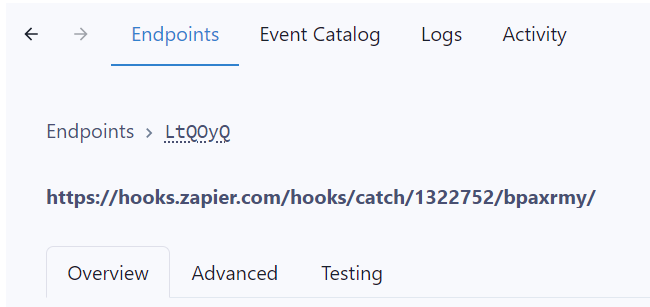
5. Click on the ‘Testing’ tab:
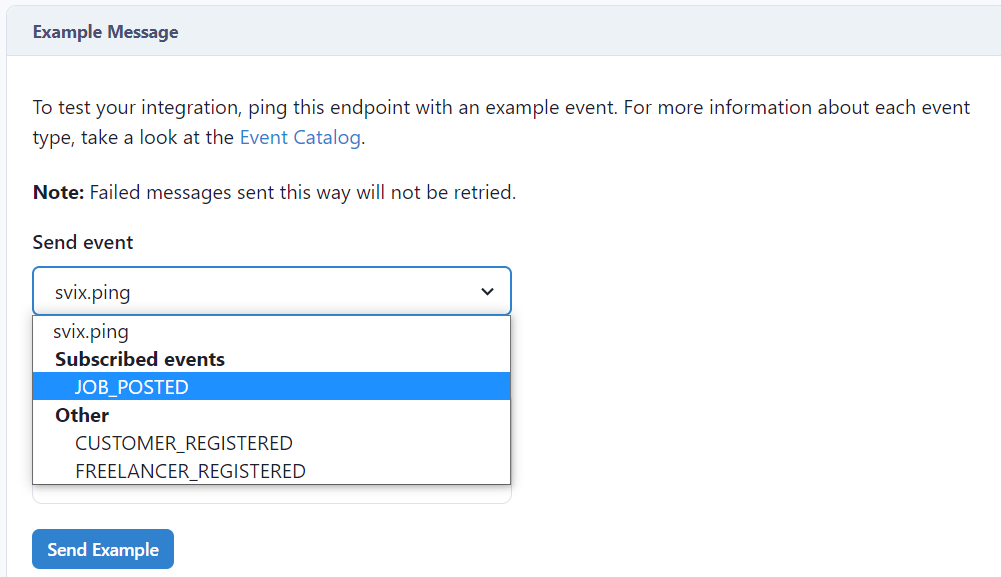
6. In the ‘Events’ dropdown, select any of the ‘Subscribed Events’ and click ‘Send Example’
Step 3: Complete Zapier Side
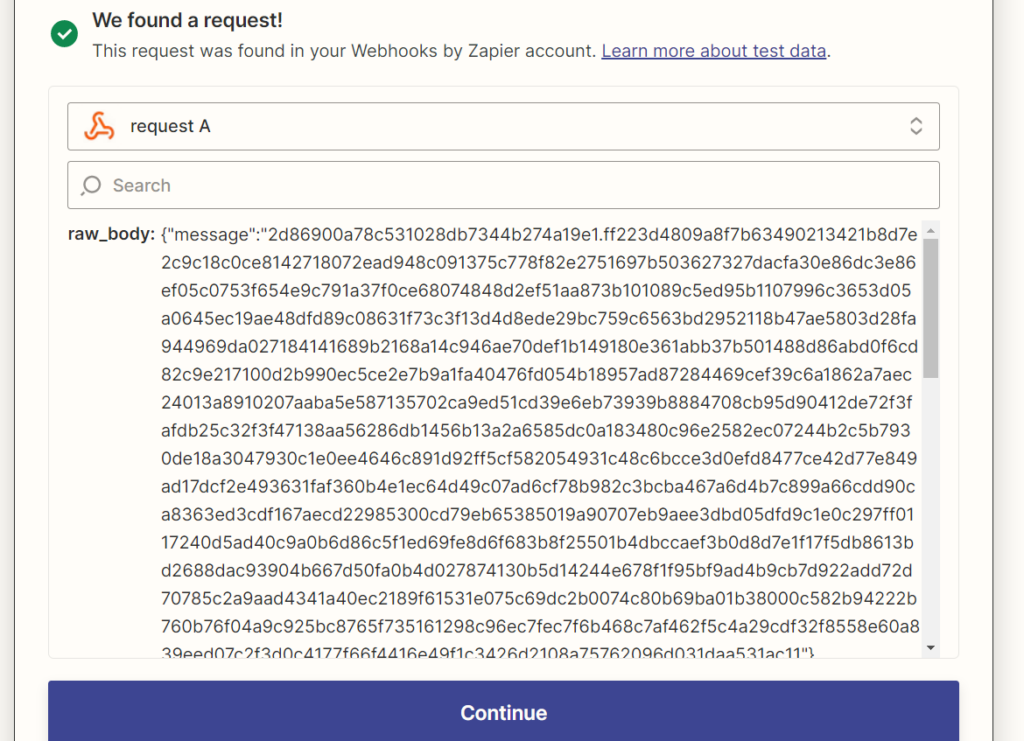
1. In your Zap, in the first Trigger item, click ‘Test’. If test info is found, click ‘Continue’:
2. Create an Action by searching and selecting ‘Code with Zapier’:
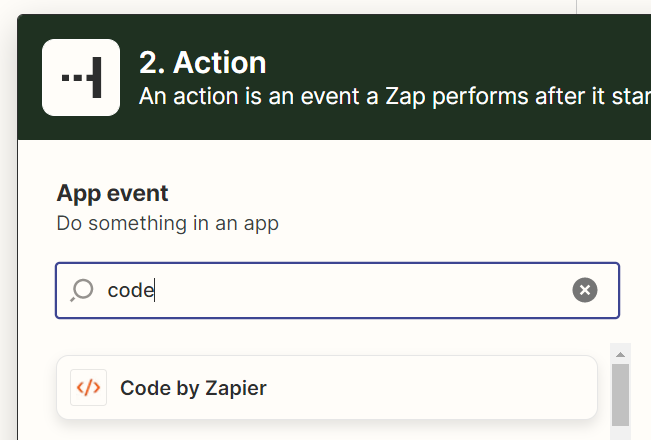
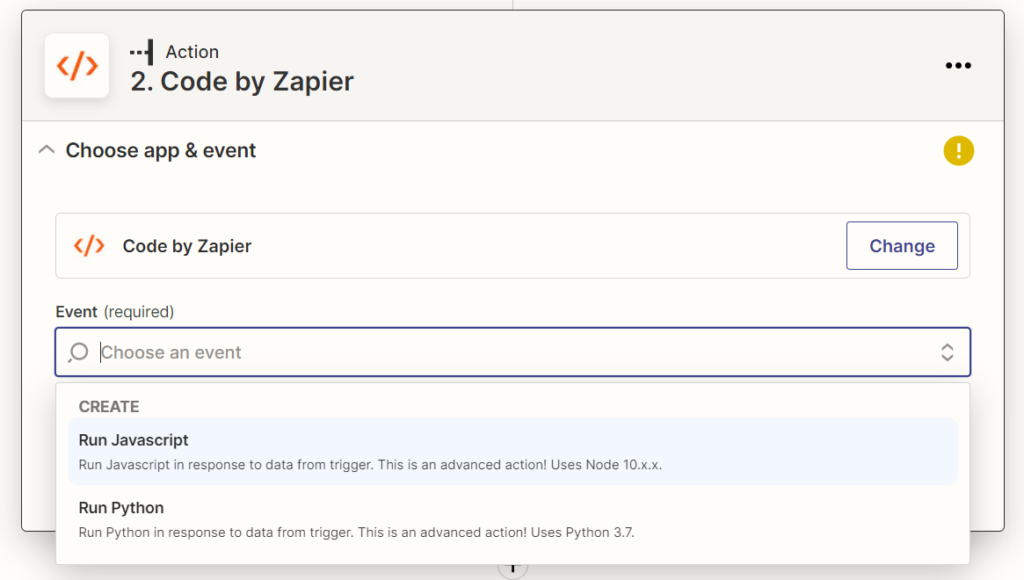
3. In ‘Events’, click ‘Run JavaScript’ and click ‘Continue’:
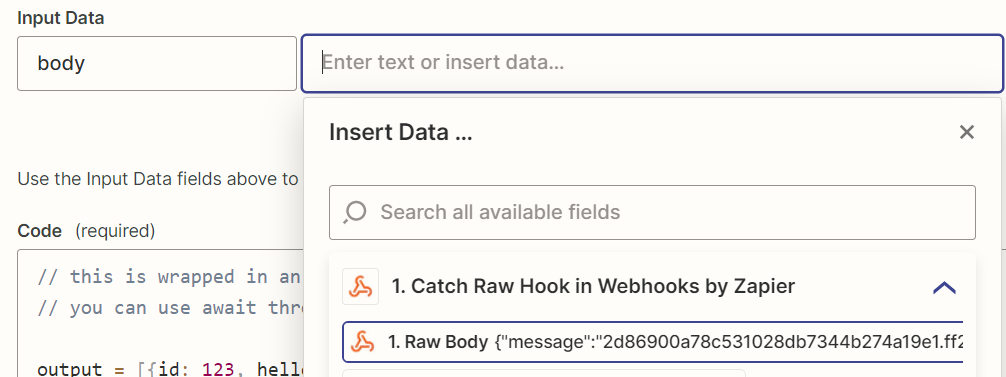
4. In the first input box, type ‘body’. In the next input box, select ‘Raw Body’:
5. Click ‘Add another item’:
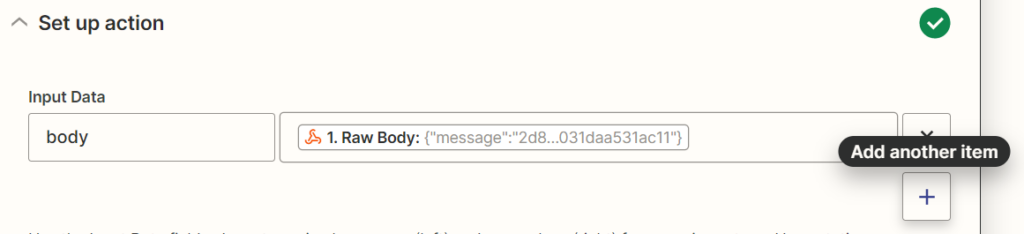
6. In the new line, type this text into the first input: ‘signatureSecretKey’, and type this into the second input: ‘test-password-example-in-here’:

7. In the ‘Code’ box, delete all the existing code and paste in the following code, then click ‘Continue’:
const crypto = require('crypto');

const allowedTimestampDeltaMs = 15e3;

const createStandardKey = (key) =>  crypto.createHash('sha256').update(String(key)).digest();

const decrypt = ({ data, key }) => {
  const algorithm = 'aes-256-ctr';
  const [iv, content] = data.split('.');
  const cKey = createStandardKey(key);
  const decipher = crypto.createDecipheriv(
    algorithm,
    cKey,
    Buffer.from(iv, 'hex'),
  );
  const decrypted = Buffer.concat([
    decipher.update(Buffer.from(content, 'hex')),
    decipher.final(),
  ]);

  return JSON.parse(decrypted.toString());
}

try {
  const data = JSON.parse(inputData.body);
  const body = decrypt({ data: data.message, key: inputData.signatureSecretKey });
  const nowTimestamp = +new Date();
  const eventTimestamp = +new Date(body.timestamp);
  const timestampDelta = Math.abs(nowTimestamp - eventTimestamp);

  output = {
    data: body.data,
    eventType: body.eventType,
    timestamp: body.timestamp,
    isTimestampValidated: timestampDelta <= allowedTimestampDeltaMs,
  };
} catch (e) {
  console.error(e);
  output = {}
}

console.log('output', output);

return output;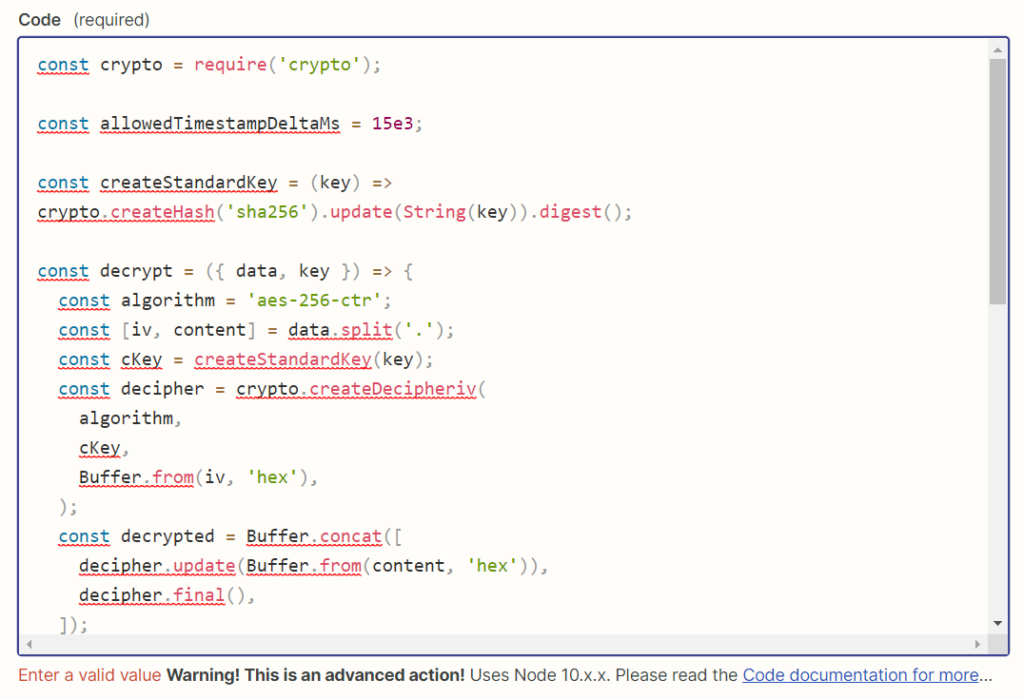
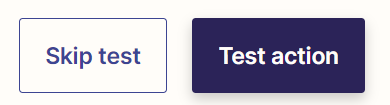
8. Click ‘Test Action’:
9. If successful, the message will be decrypted and you’ll see useful data, like someone’s name or email:
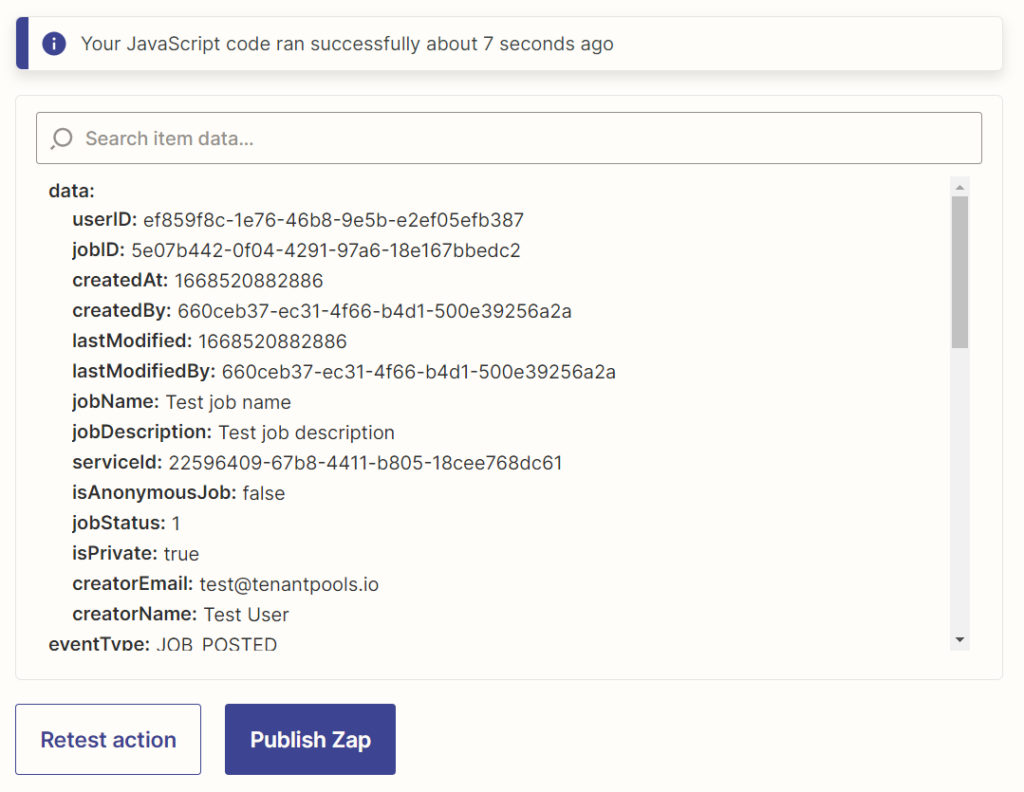
10. Click ‘Close’. If you Publish the Zap at this point, it will not be useful. But you’ll be able to get back into edit made to add the next steps.
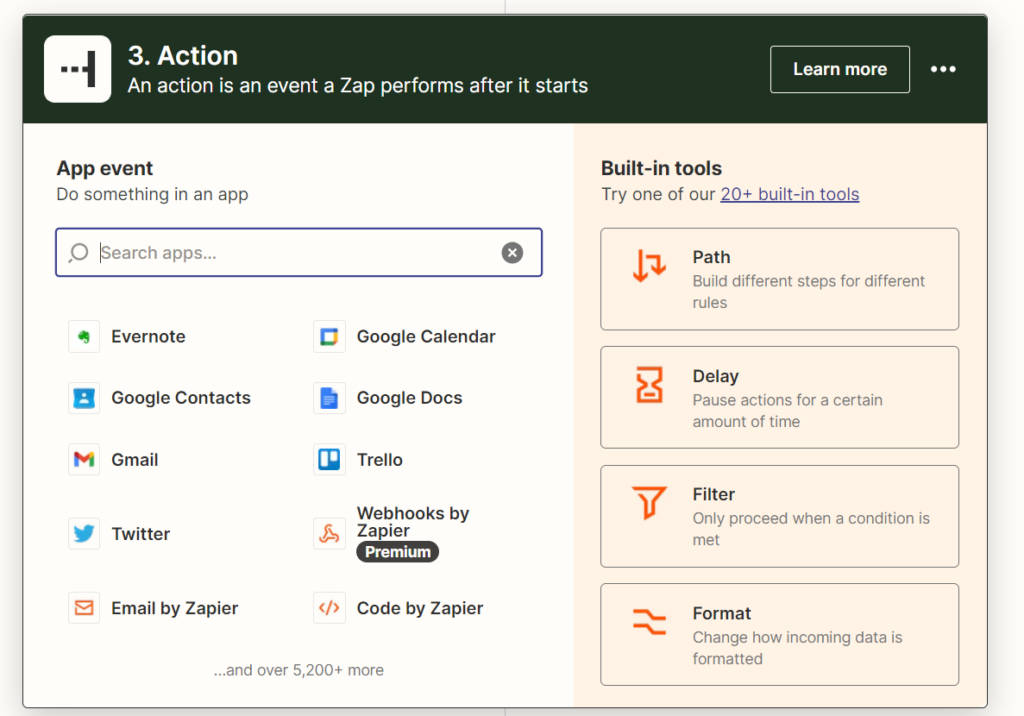
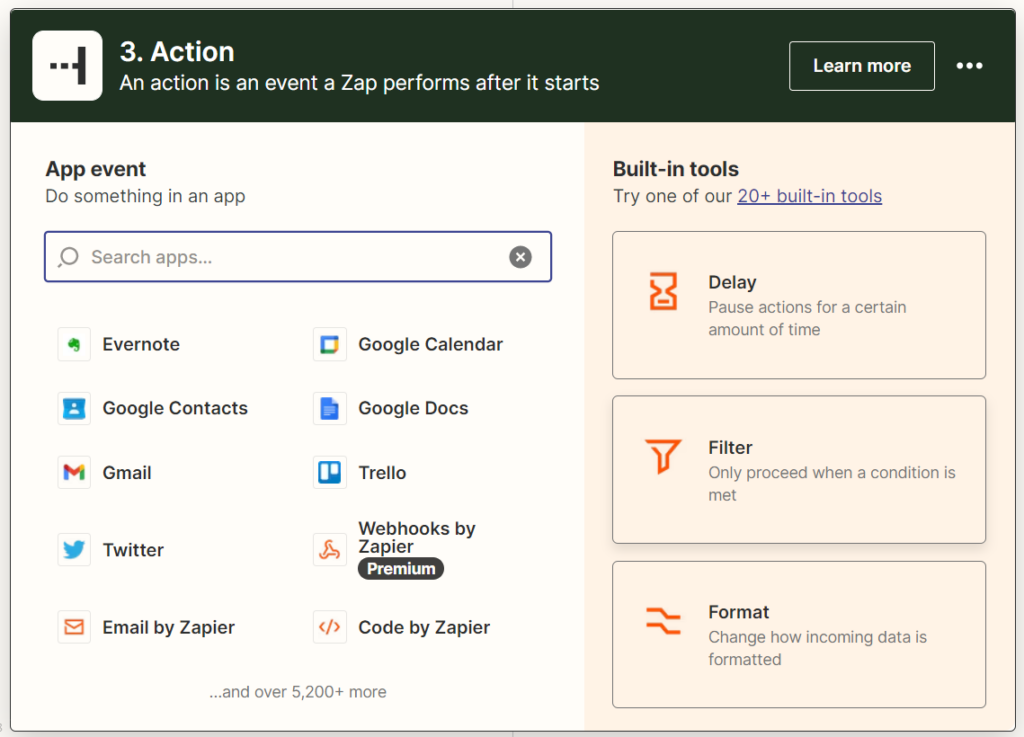
11. Click on the bottom ‘+’ button:

12. Select any application you like, and start building out your automations:
Step 3: Create a new secret key
1. After you have finished testing with test events, you should replace the SecretKeySignature with your real Secret Key. If you haven’t done so yet, create a new Secret Key in your dashboard here:
2. Then go to each Zap and update the signatureSecretKey field in the ‘Code with Zapier’ step here:

Optional Step: Verify Webhook Signatures
Video Guide to Verifying Webhook
Written Guide to Verifying Webhook
To ensure that your Zap is only reacting to legitimate webhook events, you can verify them first.
1. Create a new ‘Code with Zapier’ step after the initial Trigger:
2. Select ‘Javascript’ and input this code:
const crypto = require('crypto');

const { expectedSignature, signedContent, signingSecret } = inputData;
const preparedSignedSecret = Buffer.from(
  signingSecret.split('_')[1],
  'base64'
);
const preparedSignedContent = signedContent;
const signature = crypto
  .createHmac('sha256', preparedSignedSecret)
  .update(preparedSignedContent)
  .digest('base64');

const isMatchingSignature = expectedSignature.split(' ').some((s) =>
  crypto.timingSafeEqual(
    Buffer.from(s.split(',')[1]), Buffer.from(signature)
  )
);

output = { isMatchingSignature };
3. Create three inputs, the click ‘Continue’:
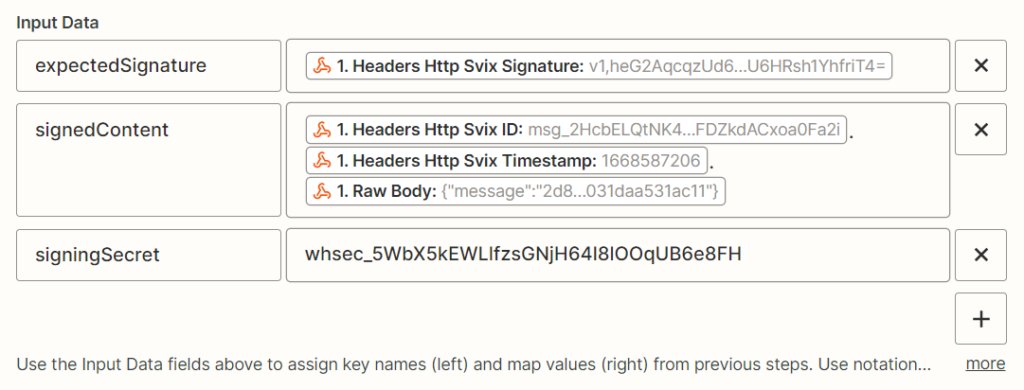
expectedSignature -> Select from the available options ‘Headers http Svix Signature’
signedContent -> Select the following options, with a point “.” in between each: ‘Headers http Svix ID”.”headers http Svix Timestamp”.”Raw Body”
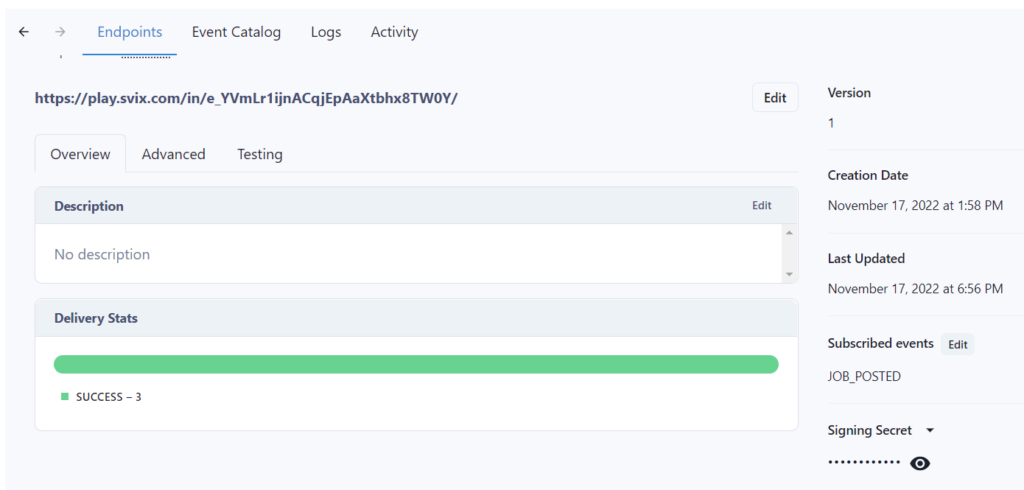
signingSecret -> Find the ‘signing secret’ in your webhook (bottom right of this image):
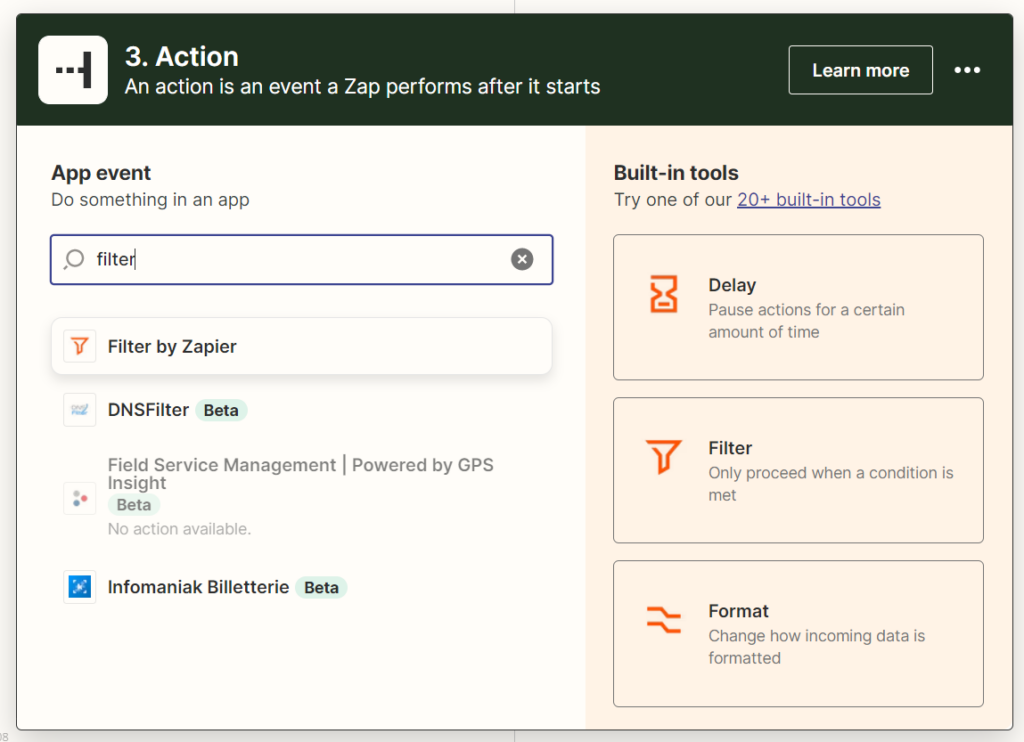
4. Create a new step after the above Code step, and select ‘Filter by Zapier’:
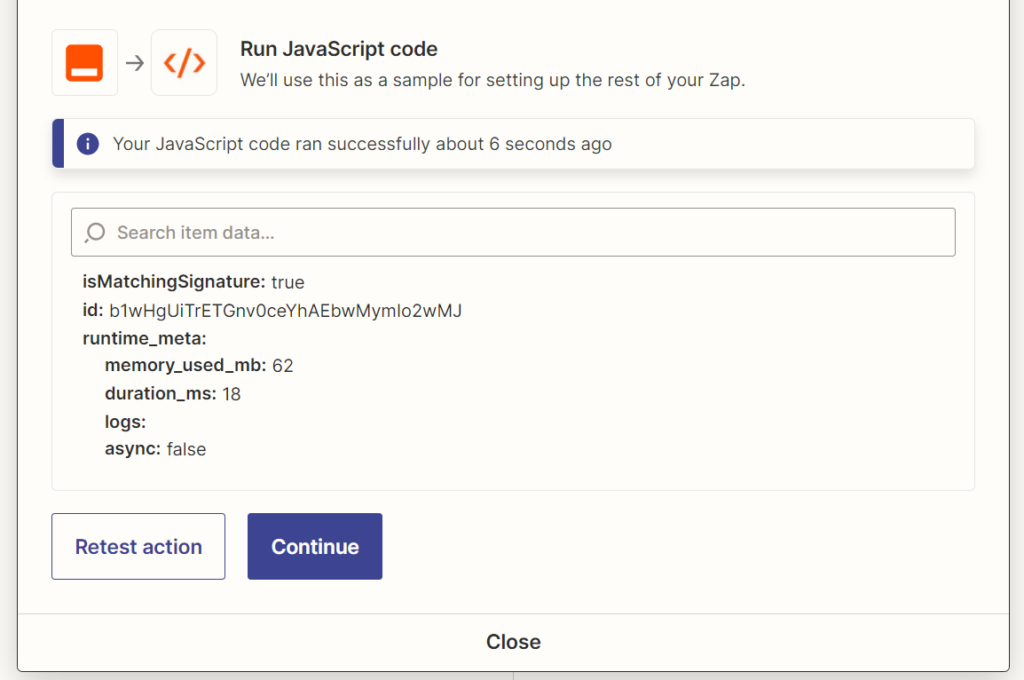
5. Run the ‘Test’ and if successful, it should say isMatchingSignature: true:
6. Finally, we’ll add a Zapier filter that will prevent the Zap from continue unless the webhook even is legitimate. Create a new action called ‘Filter by Zapier’:
7. In the ‘Only Continue If’ field, select ‘Run Code with Zapier’, then ‘IsMatchingSignature’.
8. In the ‘Conditions’ field, select ‘Boolean Is True’, then click ‘Continue’:

All done!
Good luck! Any questions, just let us know 🙂