This guide walks through how an admin can include the freelancer’s custom data tags and proposal text in the email that is automatically sent to customers when a freelancer applies for a job.
Video Guide
Step by Step Guide
On your freelancer’s profile, there may be any number of custom data items that they can tag themselves with. These could be descriptive in nature, a requirement for that user’s activation, or could be used for matching purposes to see how highly they score against job requirements. Examples of custom data types are location, budget, experience, qualifications, certificates etc.
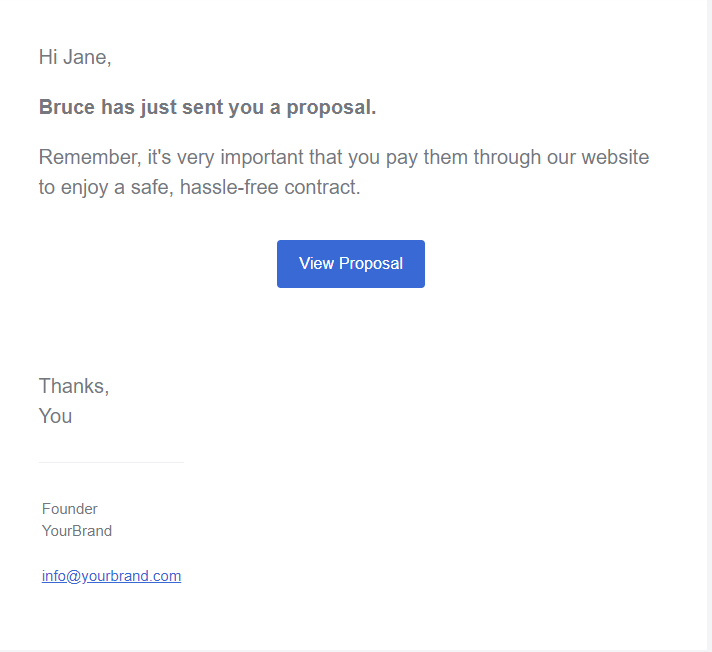
When a freelancer sends in an application for a job, an email is automatically sent to the customer that posted it, notifying them that someone has applied. Previously, the automated email appeared as shown below, and the customer needed to log in to see the user’s cover letter or profile information.
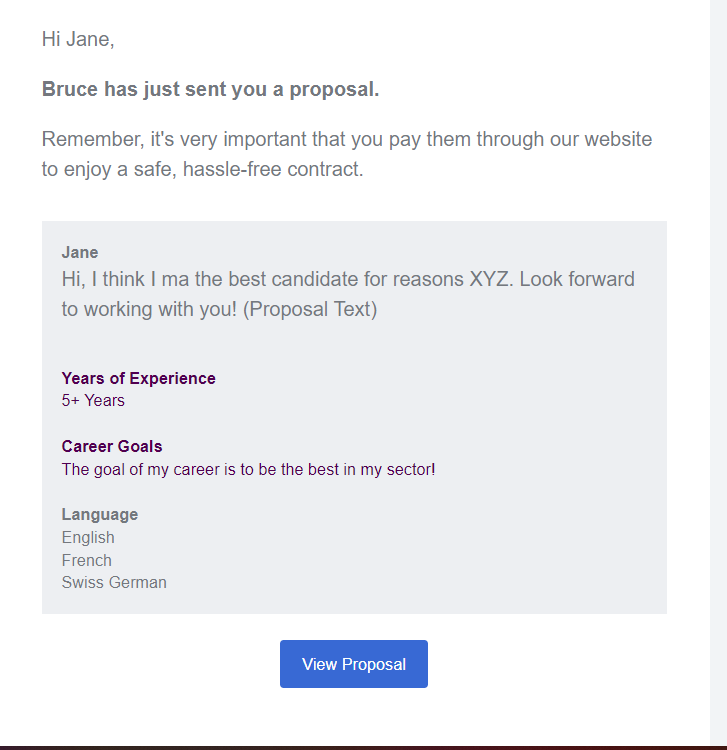
Now, some of this information can be included in the email that they receive, as shown here:
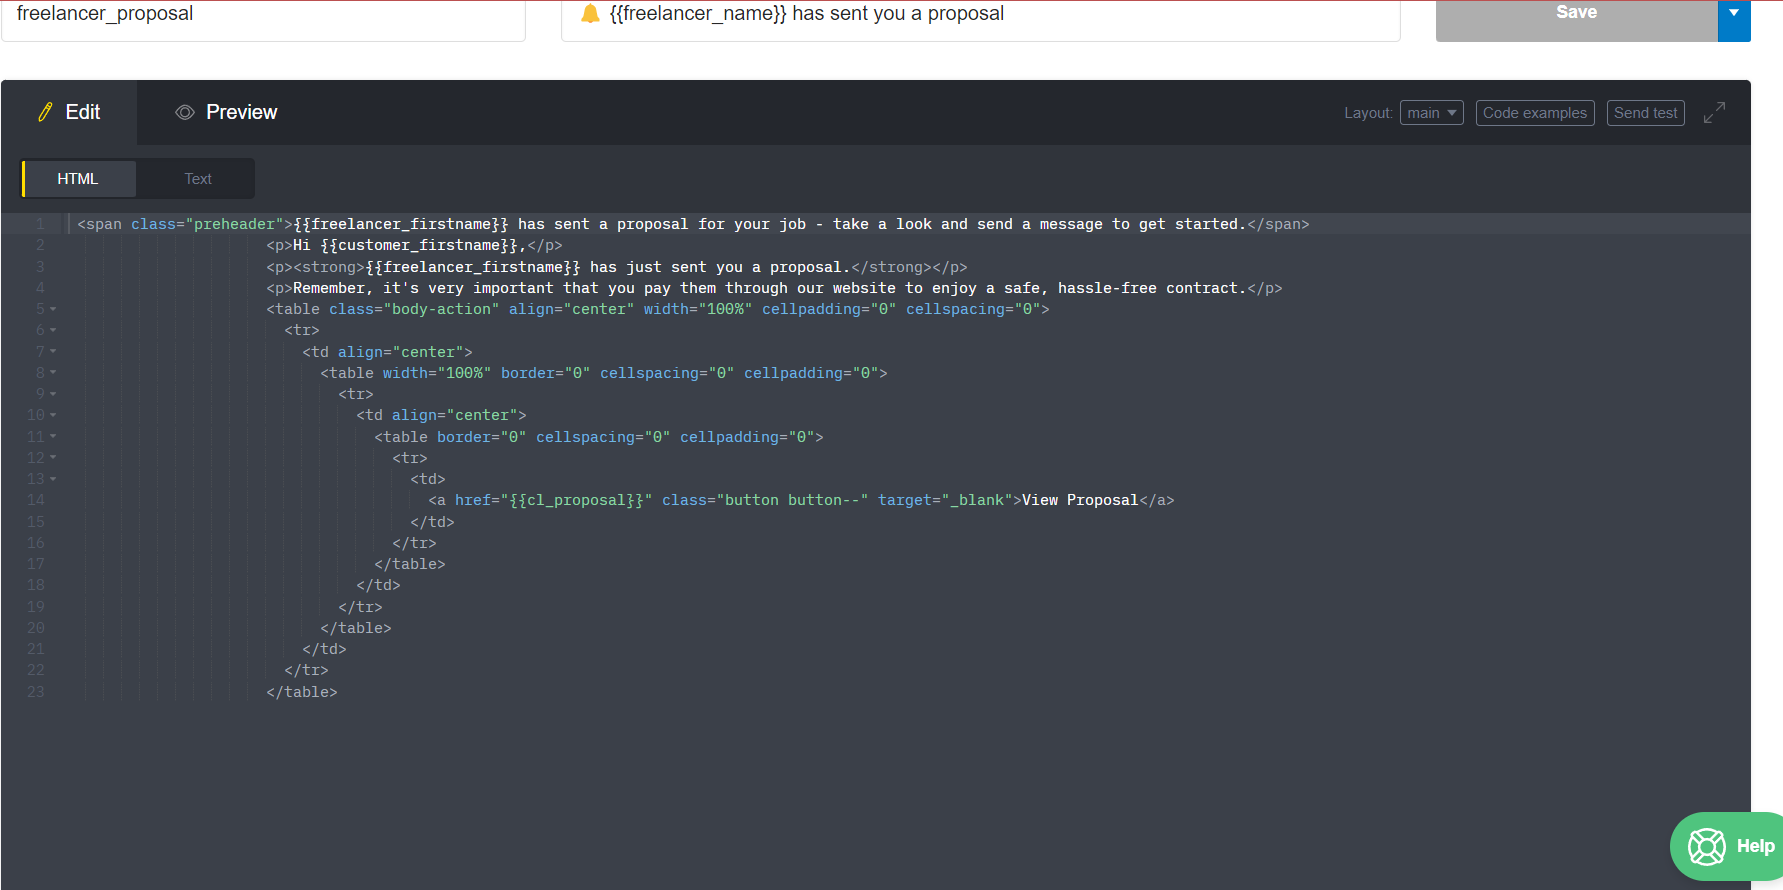
To include this supplementary information within the email, the admin must log into their Postmark account and select the template labelled ‘freelancer_proposal’. The HTML editor will show the code that specifies what appears in the email. The code already in the HTML editor should appear as follows:
Here we will add the custom data items and proposal text, by copying and pasting the code provided below. Insert it between “<td align=”center”>” and “<table width=”100%”.
 <table class="attributes" width="100%" cellpadding="0" cellspacing="0">
                              <tr>
                                <td class="attributes_content">
                                  <table width="100%" cellpadding="0" cellspacing="0">
                                    <tr>
                                      	<td class="attributes_item">
                                      	  <strong>Hi, {{customer_firstname}}</strong><br/>
                                      	  <p>{{proposal_description}}</p>

                                      	  {{# custom_yearofexperience.title }}<br/>
                                            <strong>{{ ../title }}</strong>
                                            {{#each ../values}}
                                              <br/>{{ . }}
                                            {{/each}}
                                          {{/ custom_yearofexperience.title }}<br/>

                                          {{# custom_test.title }}<br/>
                                            <strong>{{ ../title }}</strong>
                                            {{#each ../values}}
                                              <br/>{{ . }}
                                            {{/each}}
                                          {{/ custom_test.title }}<br/>

                                          {{# custom_language.title }}<br/>
                                            <strong>{{ ../title }}</strong>
                                            {{#each ../values}}
                                              <br/>{{ . }}
                                            {{/each}}
                                          {{/ custom_language.title }}<br/>
                                      	 </td>
                                    </tr>
                                  </table>
                                </td>
                              </tr>
                            </table>
This code already includes three custom data items- ‘language’, ‘test’ and ‘yearofexperience’. You will need to go to your admin dashboard and find the exact name of the data types you want to include in this email, and change the names accordingly. To do this, you must change the custom data name ‘XXX’ in the example of the code provided below in the first and final lines.
{{# custom_XXX.title }}<br/>
<strong>{{ ../title }}</strong>
{{#each ../values}}
<br/>{{ . }}
{{/each}}
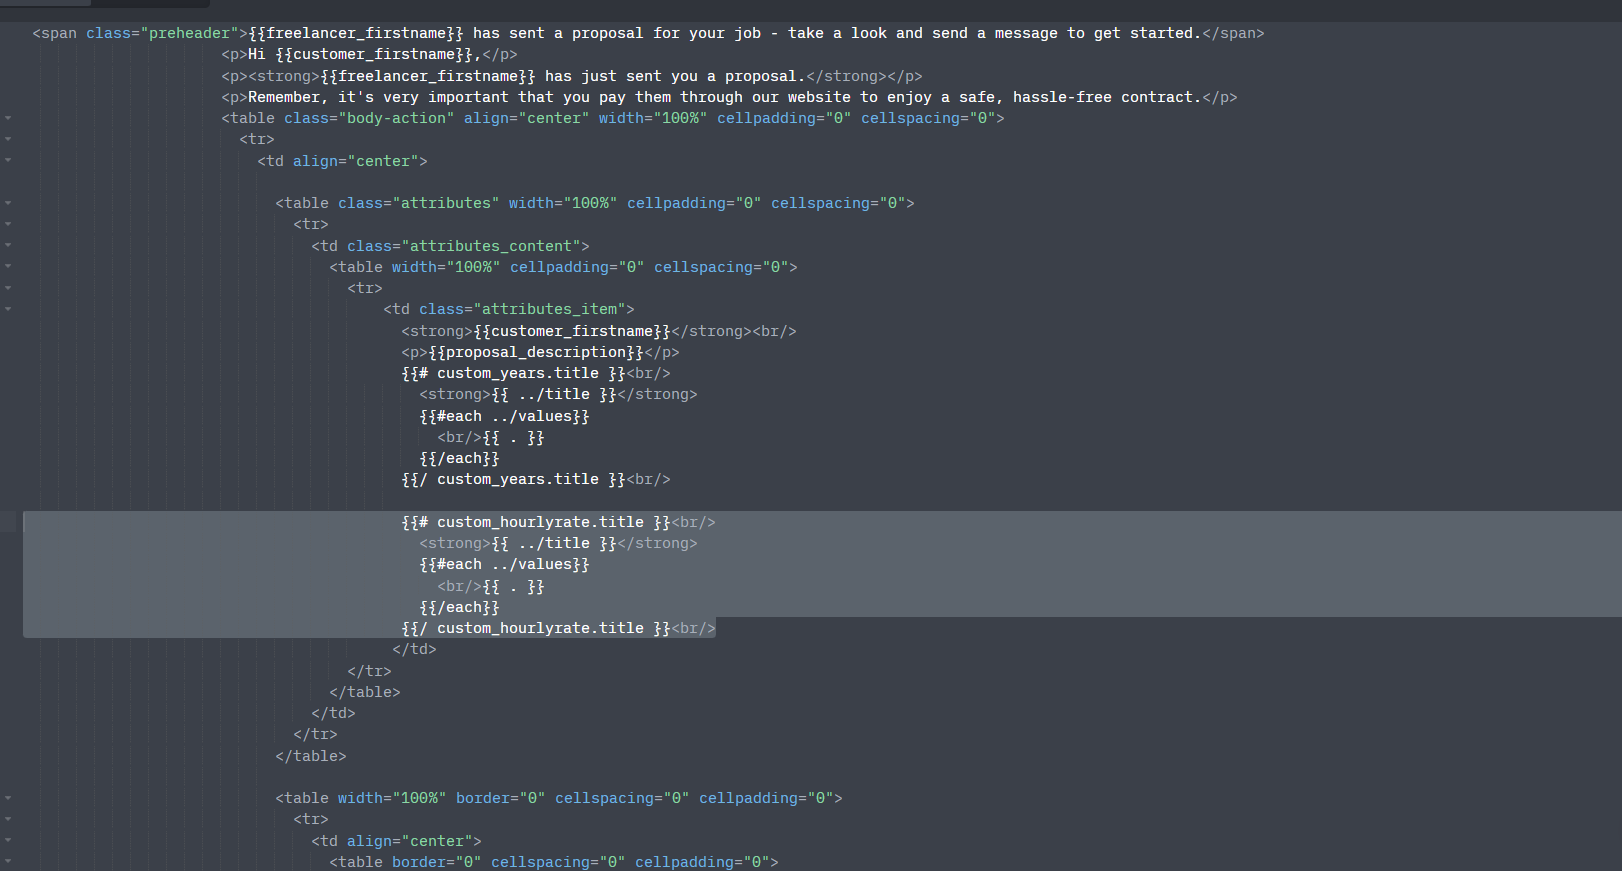
{{/ custom_XXX.title }}<br/>Once all the code has been added to the template, it should appear similar to this:
In addition to including the proposal text and custom data items, there is also a feature that will include the user’s CV in this email, if they have uploaded one onto the system. More information in this video guide.