This document explains a new feature that allows the talent on your marketplace to create an item which can be booked by their clients.
Video Guide
Step by Step Guide
In the admin dashboard is the option to ‘Enable the product functionality? (Optional)’
Enabling this feature will create the pages that your users can navigate to in order to create and view products. First you must add the links to your user’s menu. Ensure that you have the ‘Edit your menus? (Optional)’ feature enabled. Go to the ‘Menu’ menu item in the admin dashboard, and click ‘Add Item’. You can name the new menu option on the left, and input the link on the right. Drag and drop the new item so it is placed where you want it relative to the other menu items.
On the freelancers page the internal link to create a new product is: /products/create
On the freelancers page the internal link to view products to edit products they have created is: /products
On the freelancers page the internal link to view their drafted products is: /products/draft
On the Customers page the internal link is: /products
On the Public page you can include the link: /products. This will display the available products that can be booked. When a client tries to book one they will be asked to login or register.

Now your platform is set-up so that your users can easily choose to create, view and manage their products. When Freelancers follow the link they are guided to the product creation page.
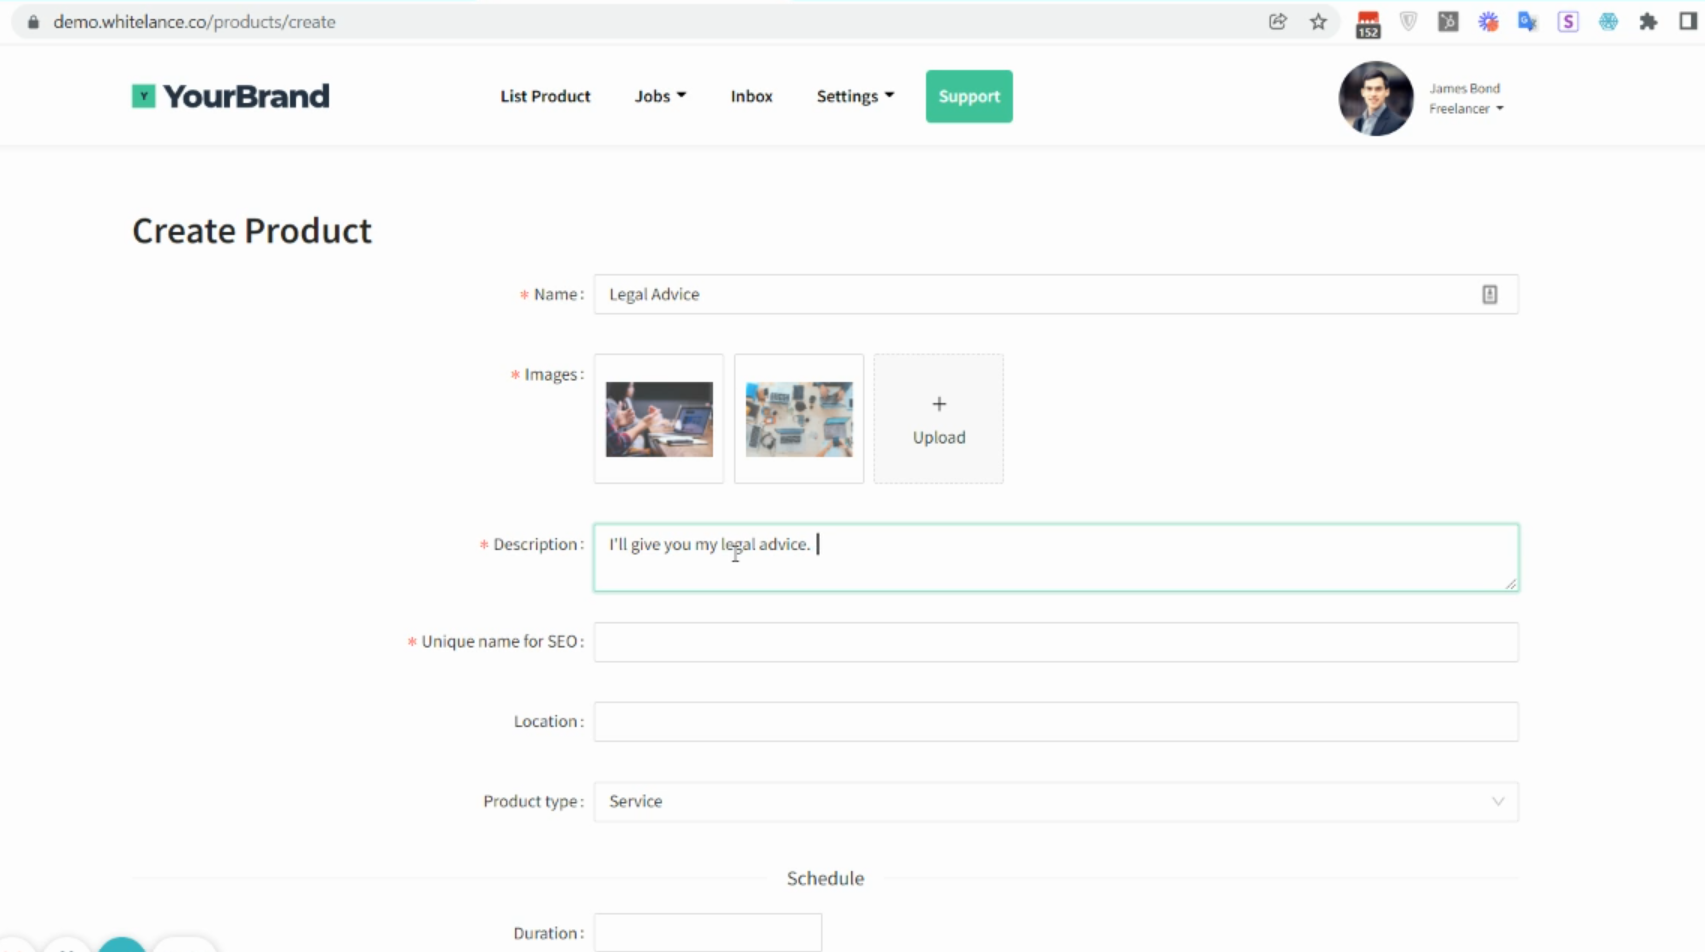
On this page the seller inputs all relevant details (title, description, location etc). All the titles can be changed in the content file of your admin dashboard by searching for “app.containers.Product.CreateProduct” and changing the content of the relevant variable.
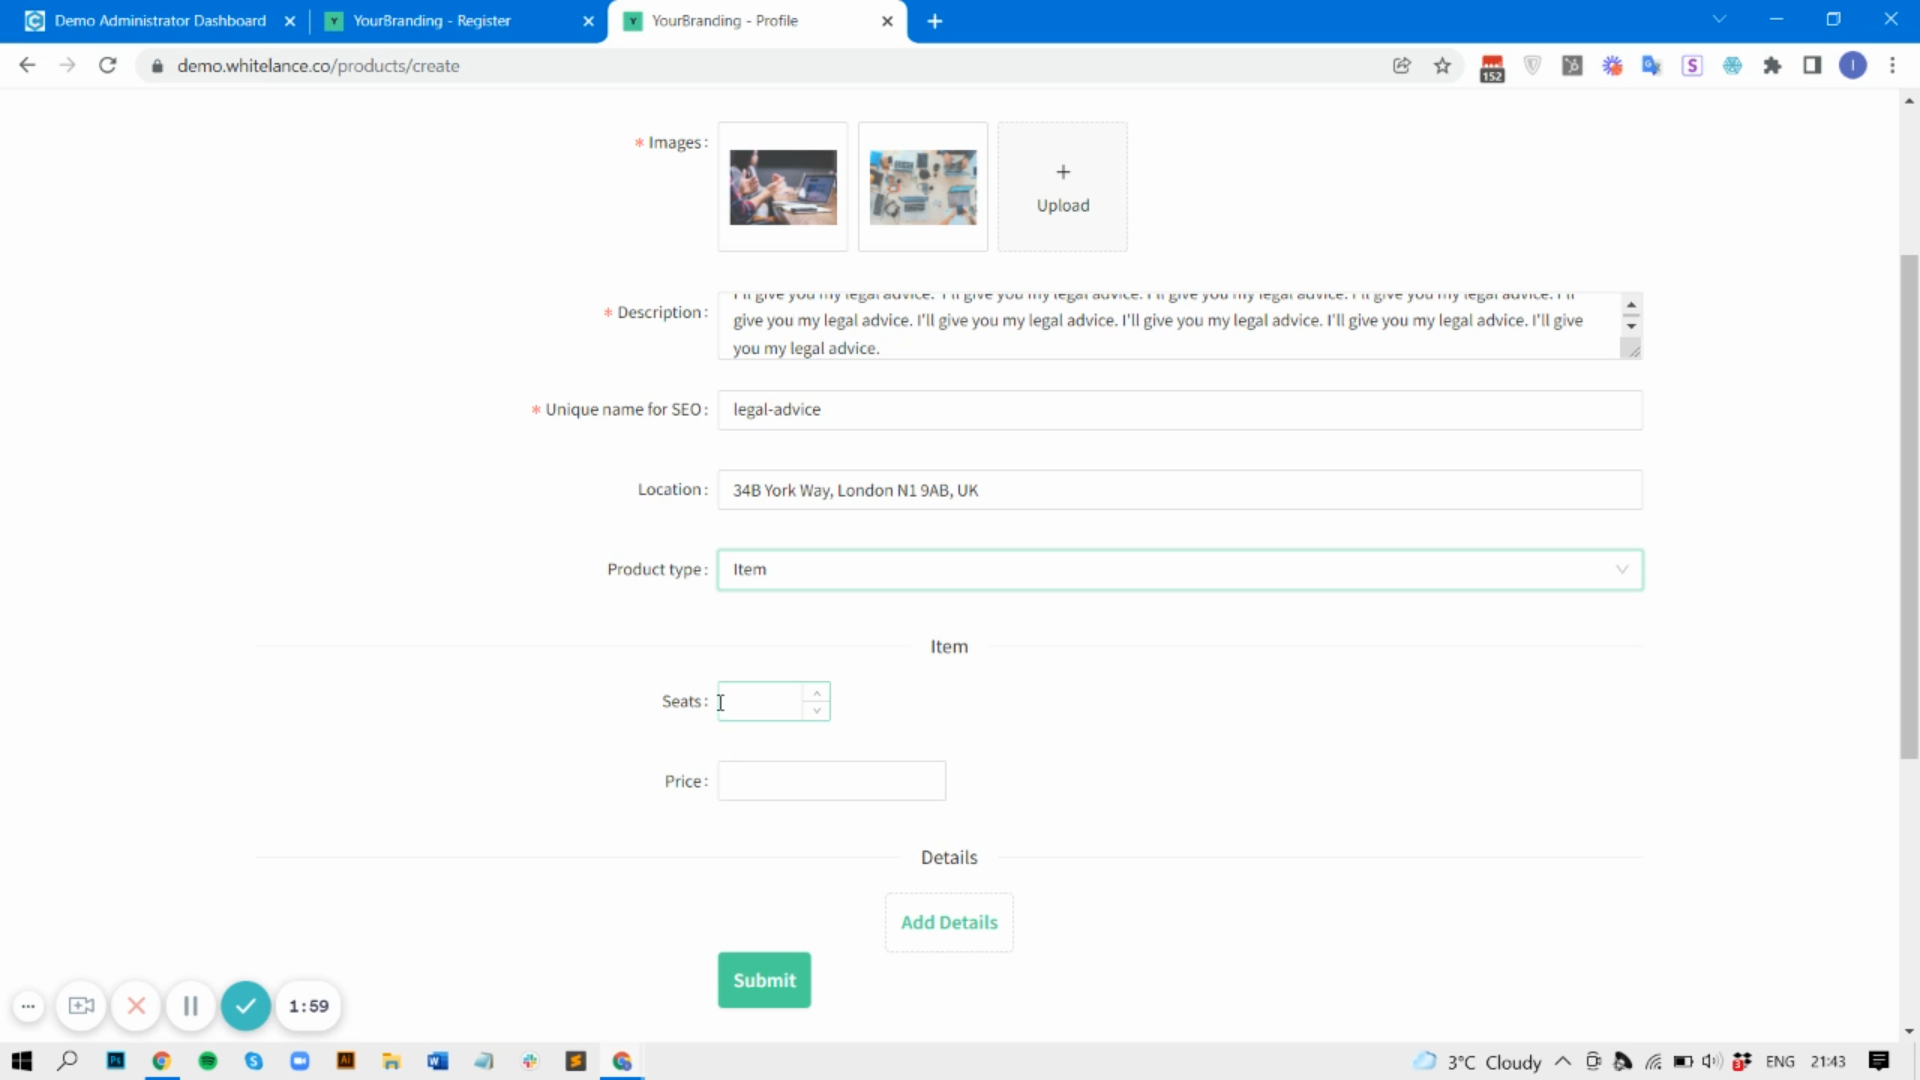
Under ‘Product Type’ is the option to choose between an item or a service. For items the seller can choose how many they have available to sell (seats) and at what cost (price).
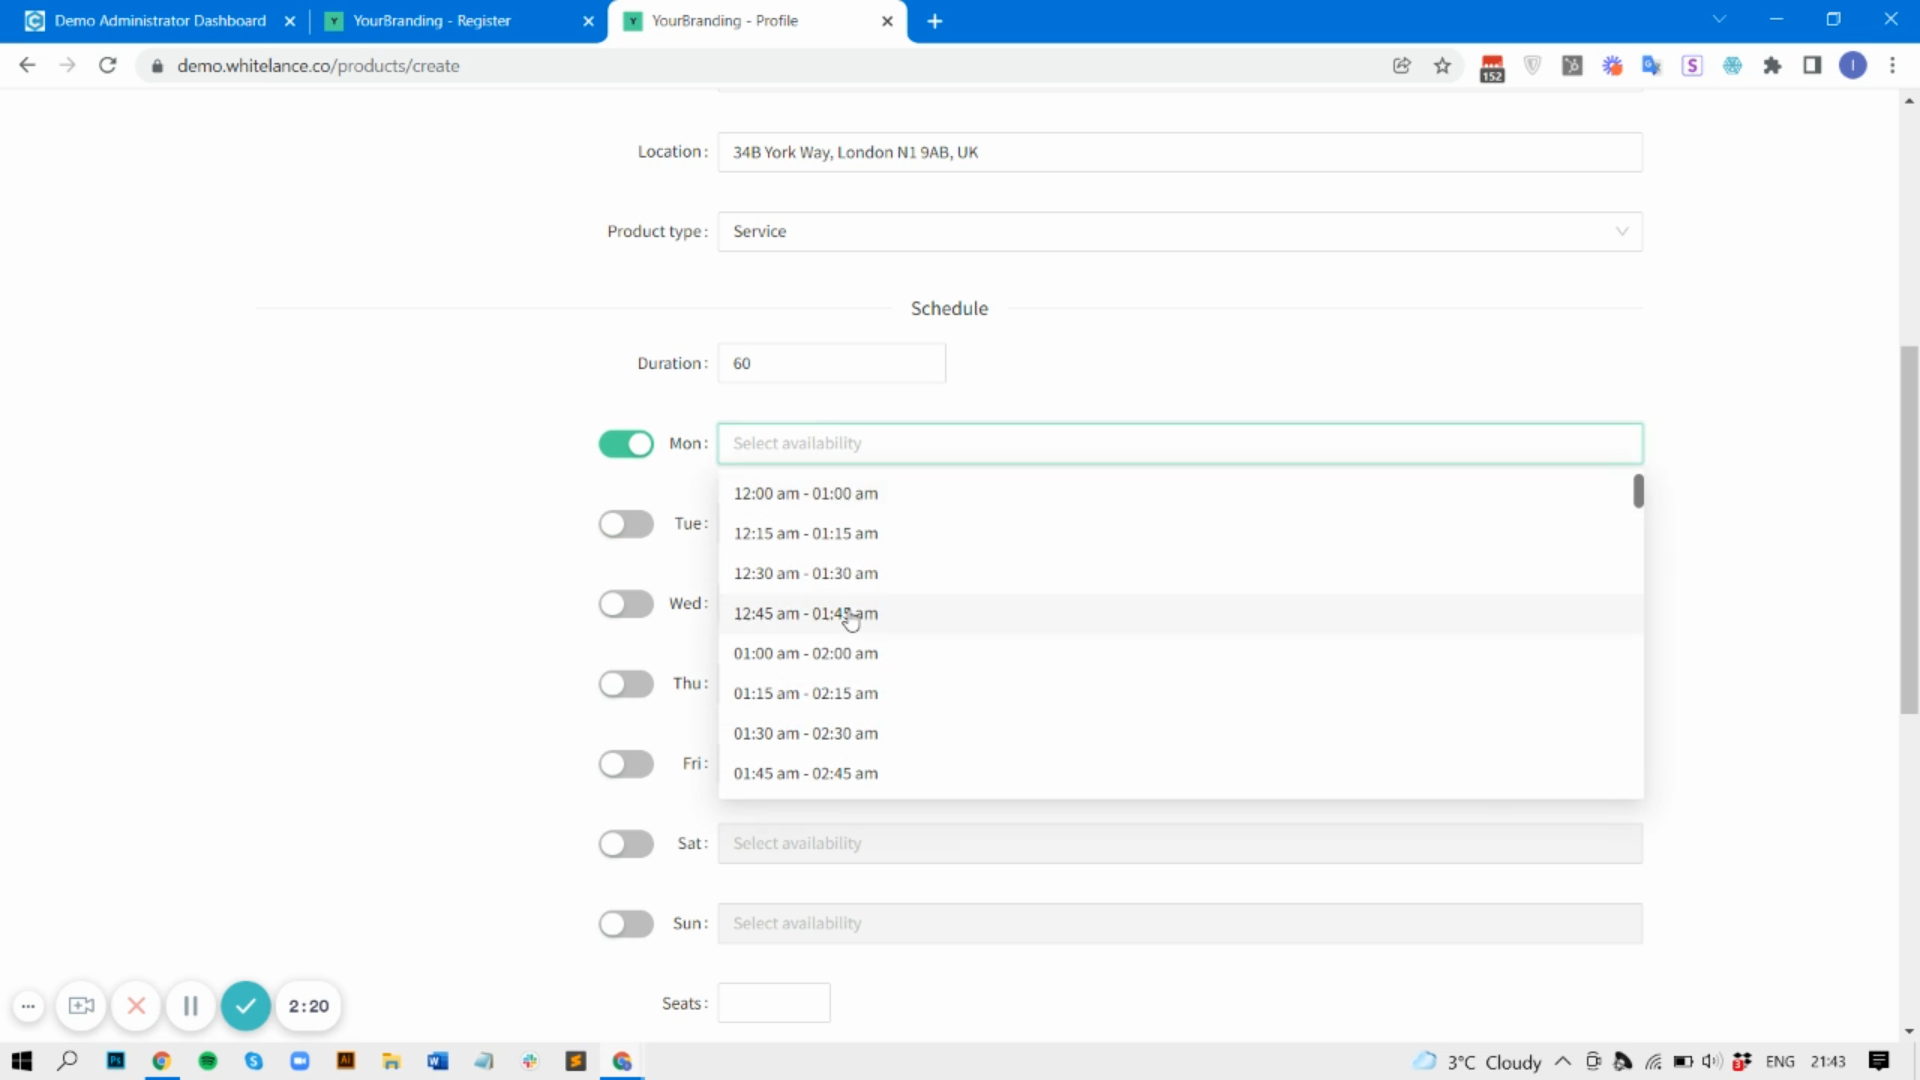
For services the seller must choose the duration in minutes, after which they can select the days and times during which they can offer their service. If the service is a group activity they can also select the number of participants that can book at the same time (seats).
Finally is the option to add extra details, which are custom data items that the marketplace owner must create. These fields can be a text input, a drop down list with single/multi-select options or a file upload. When creating the custom data type the admin must select the option ‘Use this data point within Products?‘ for it to appear on the product creation page.
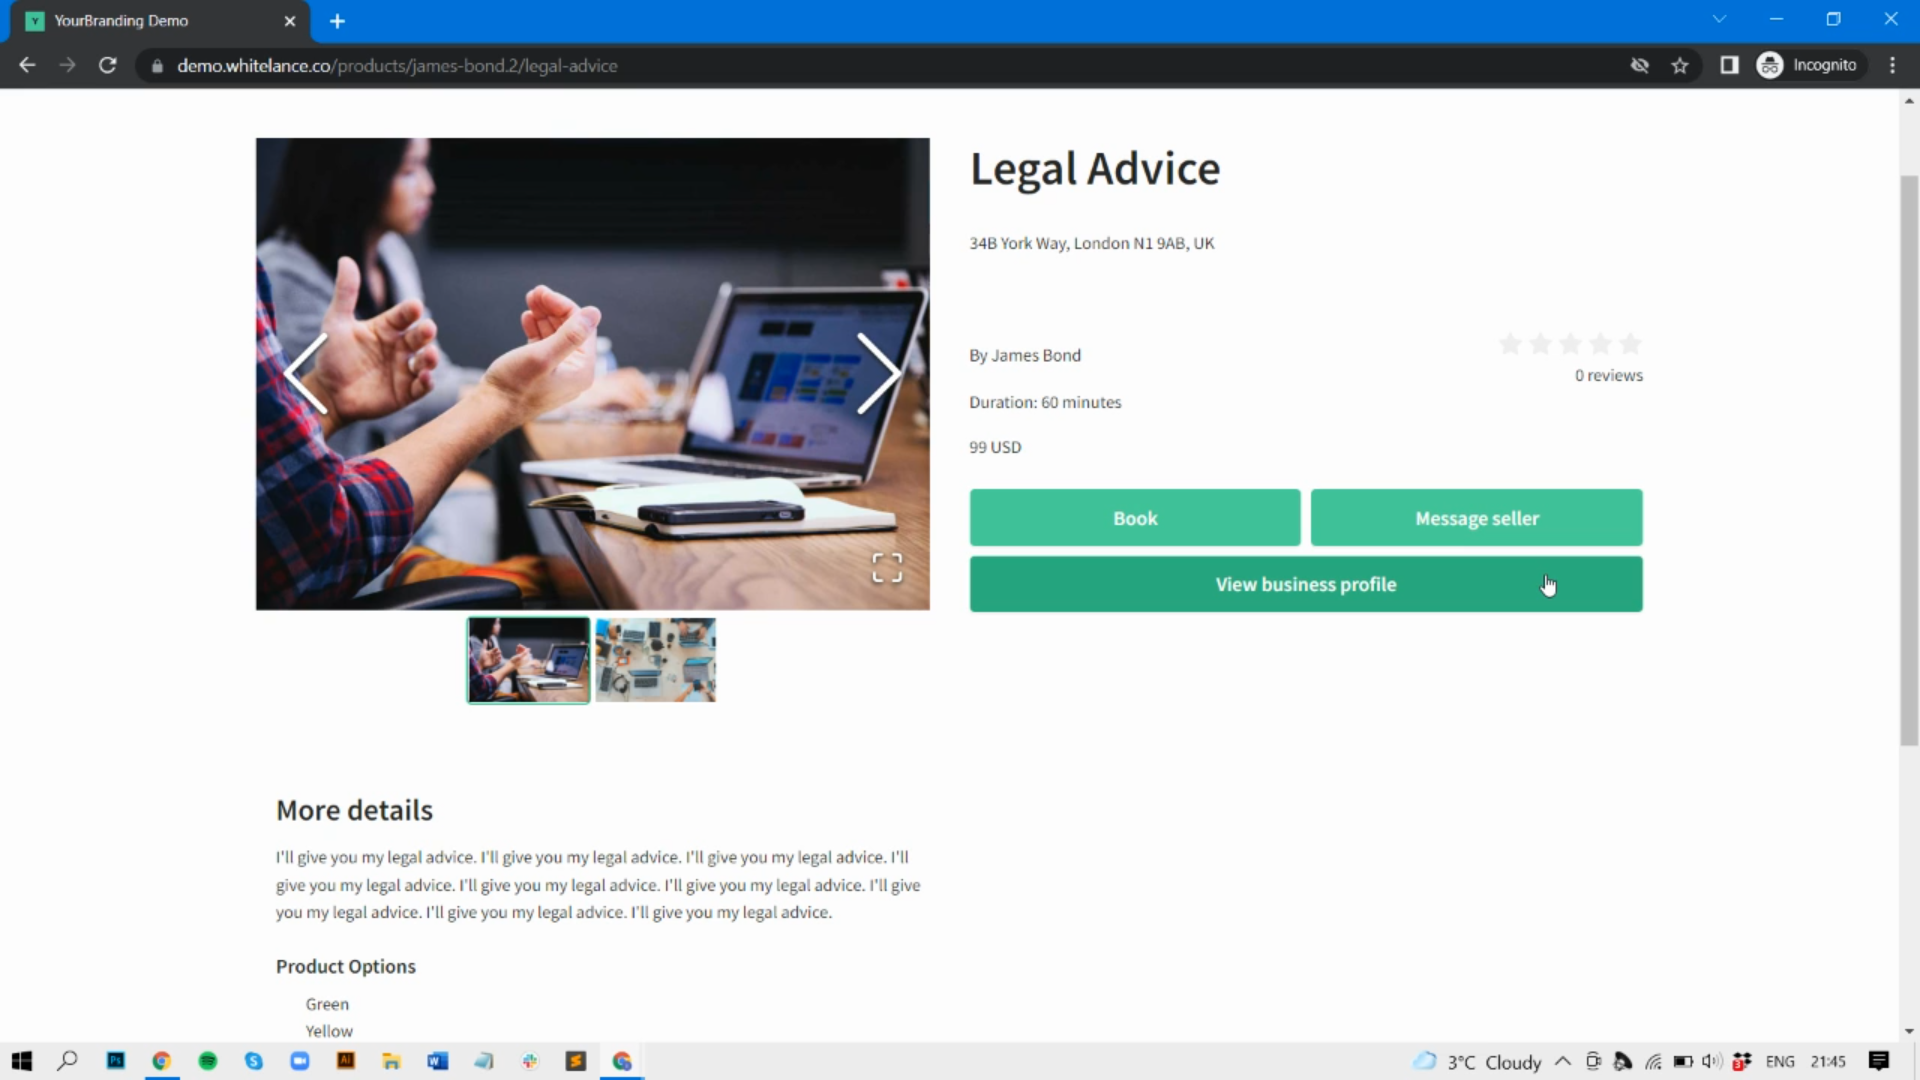
Once a product has been created anyone can view it by going to [YourMarketplace.com]/products. They can click ‘Book’ to see more details.
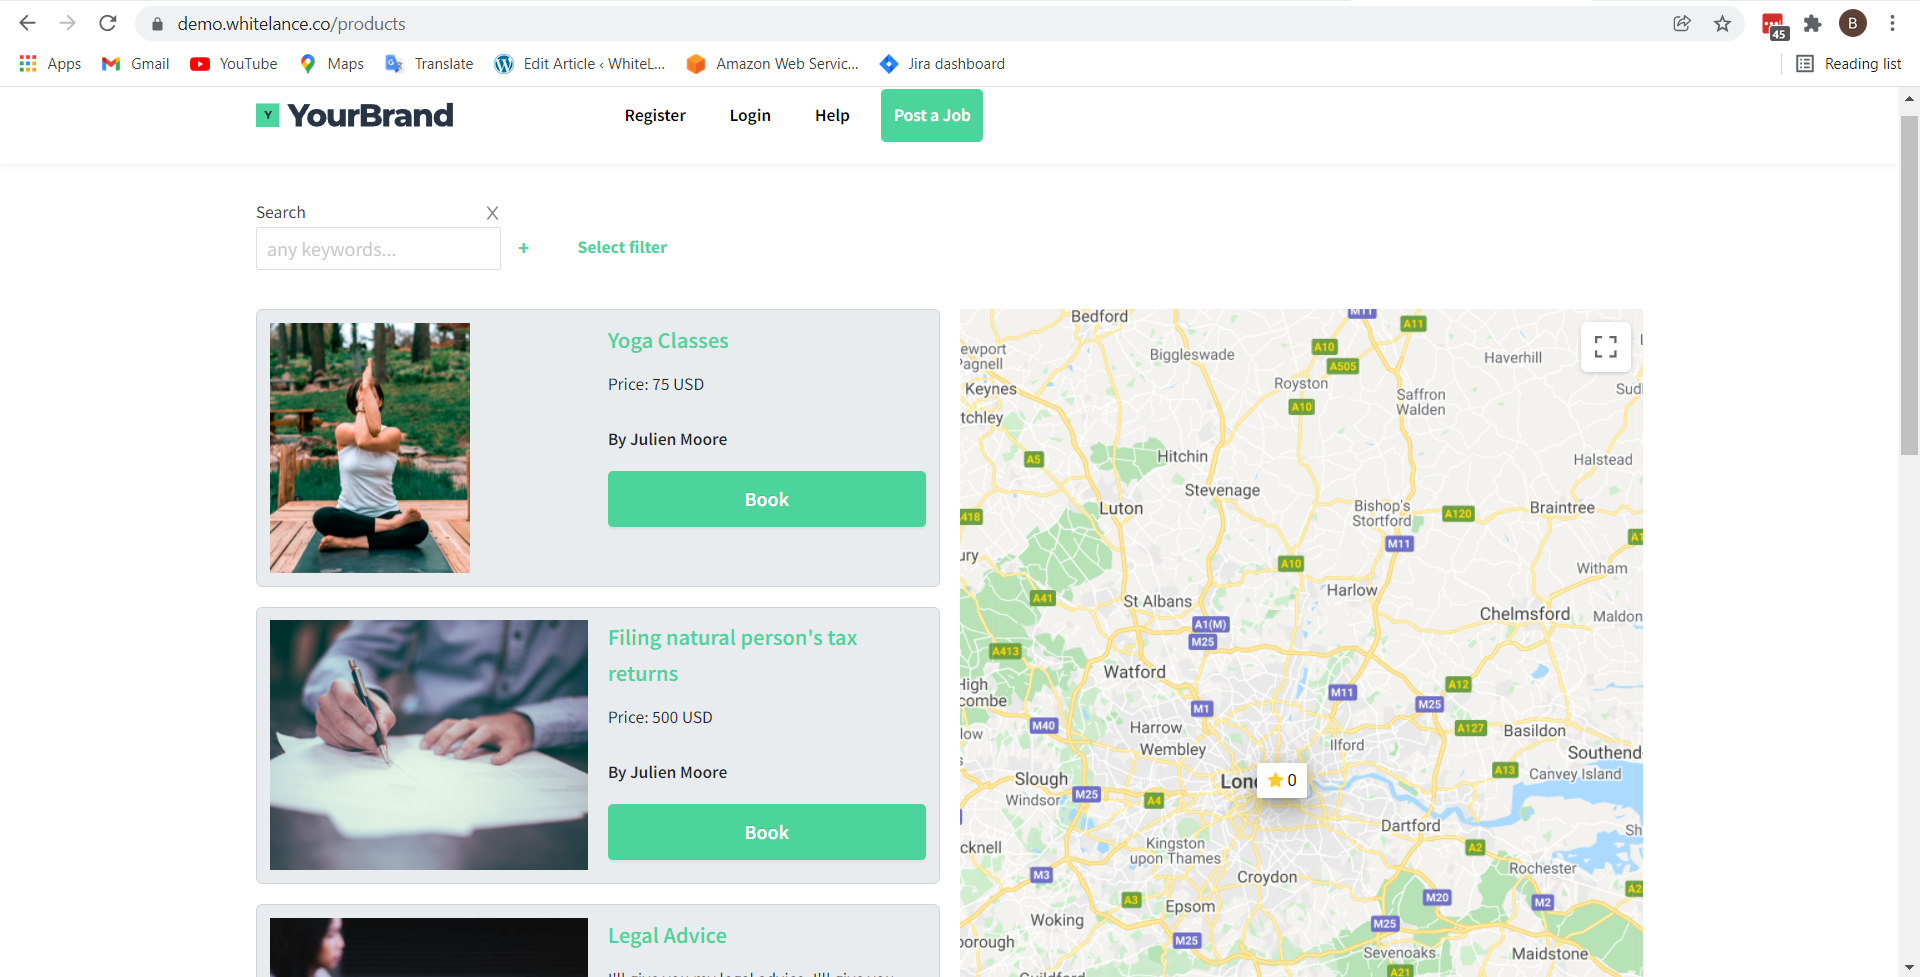
When viewing the specific product if the user tries to ‘Book’ they will be be prompted to either login or register.
Then they will be able to choose the specific day (several weeks in advance) and time that they want to book for.
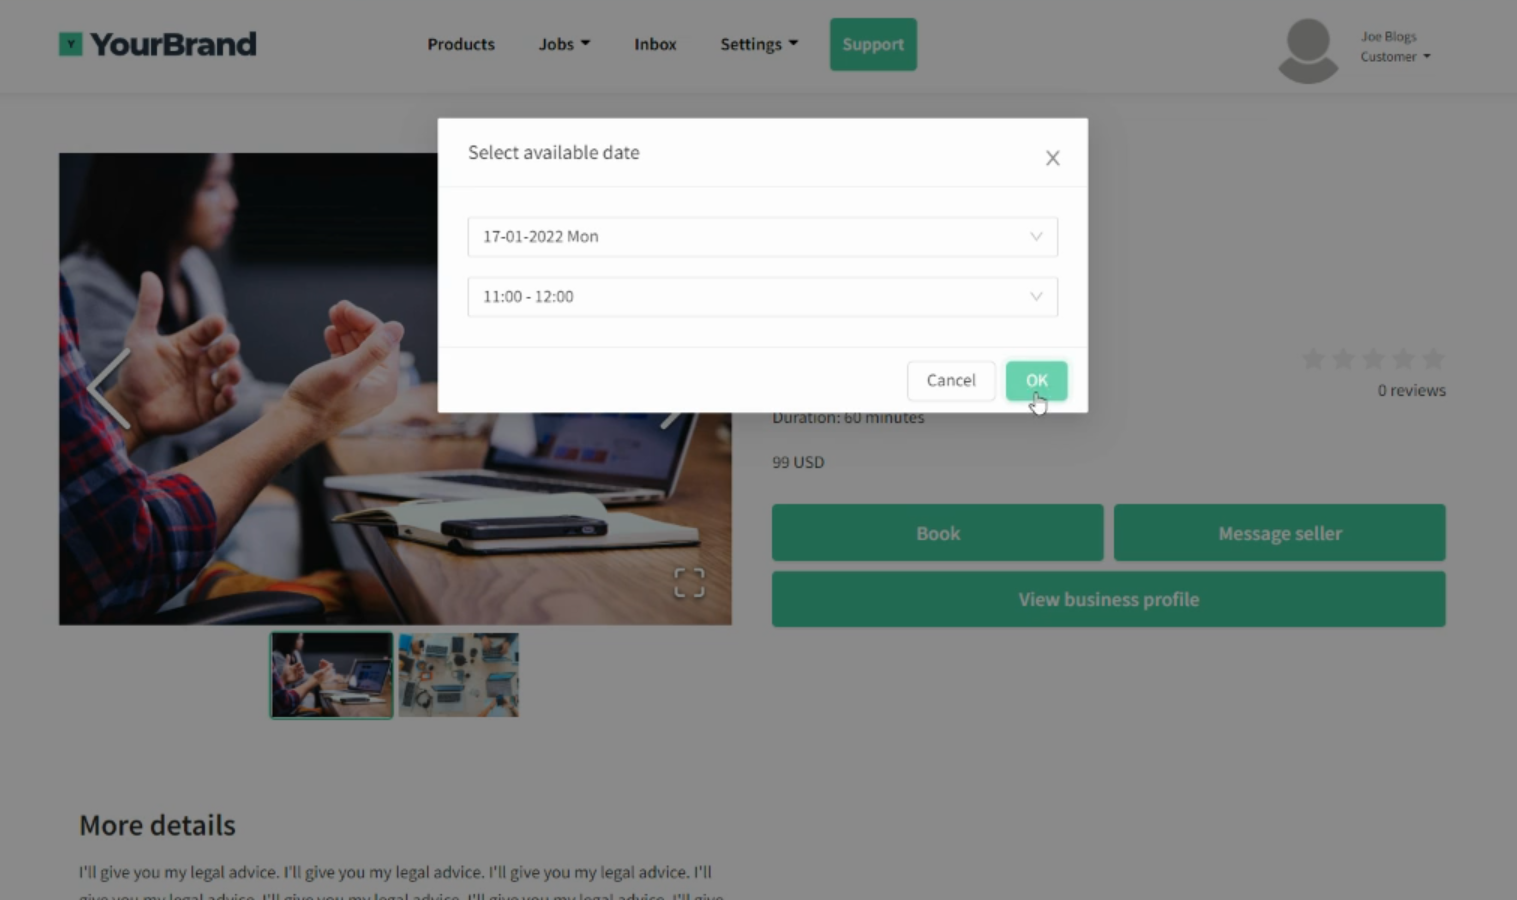
Once confirmed, this product will appear as a milestone and will be listed in the ‘my jobs’ page.
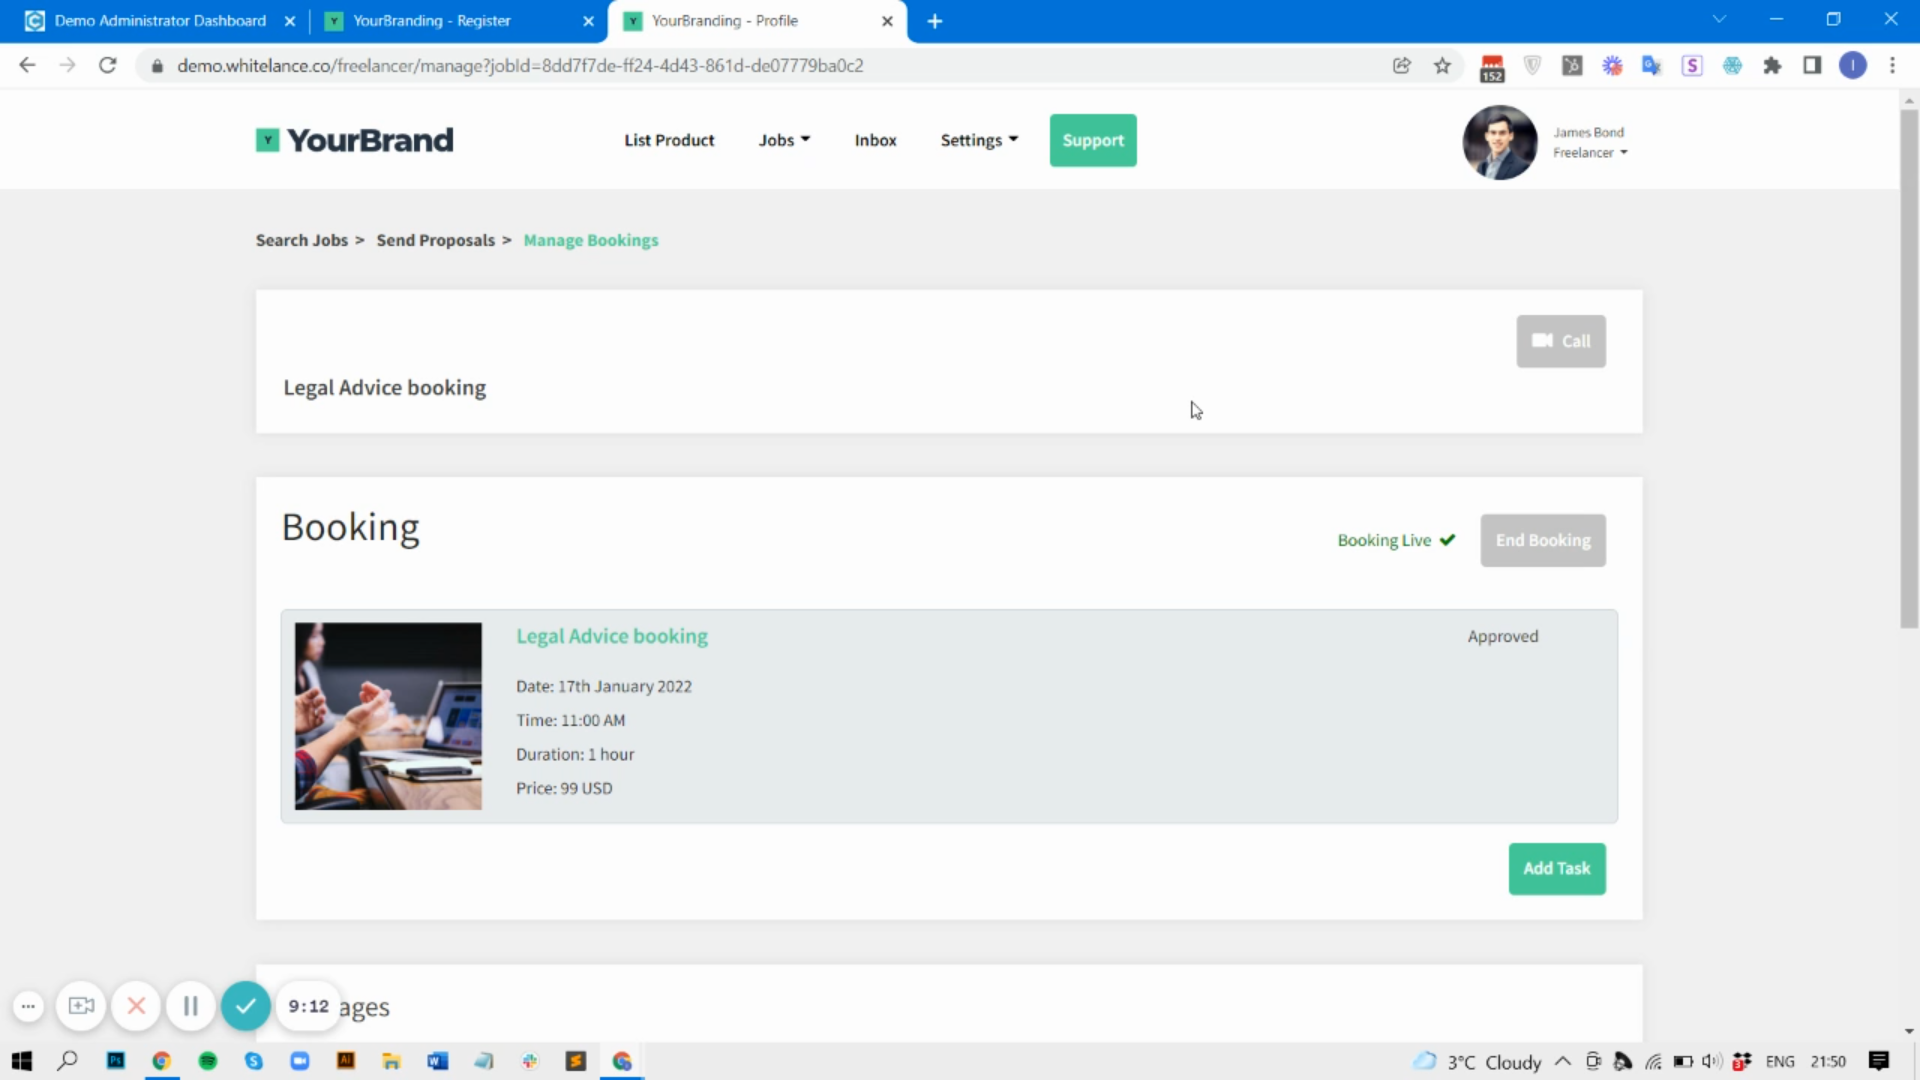
Once a product has been created the users can contract using the default (Upwork-style) marketplace model by clicking ‘Add Task’ and choosing individual or repeating milestone. This way, if a seller was running a weekly group session with 4 clients the clients could book the seller’s product as a one-off trial session to see whether they are satisfied with the product. If they want to continue the classes they could choose to pay as individual tasks for each session, or with a monthly retainer prepaying for each month, or by using a timesheet system to input the number of hours at the set hourly rate every week/month. Or they can book more sessions from the products page.
Once all active milestones have been approved and paid the booking can be ended, at which point the contract will be closed.