This guide explains how to change the menu items on user profiles. The text, appearance, link, style and more can be changed in the administrator dashboard of your contractor management platform powered by TalentPools.
Video Guide
Step by Step Guide
To begin editing your menus, first you must enable the feature in your admin dashboard by selecting the ‘Edit your menus?’ option under the ‘Settings’ menu item.

On your admin dashboard under the ‘Menu’ menu item are all the tools you need to change the menu appearance, content and style of the menu buttons that are at the top of your users’ screen.

There are three menu tabs that can be adapted, each in the same way- Freelancer, Customer and Public. Each of these tabs reflects the respective authentication of your users, where ‘Public’ is the menu appearance for any users that are not logged in.
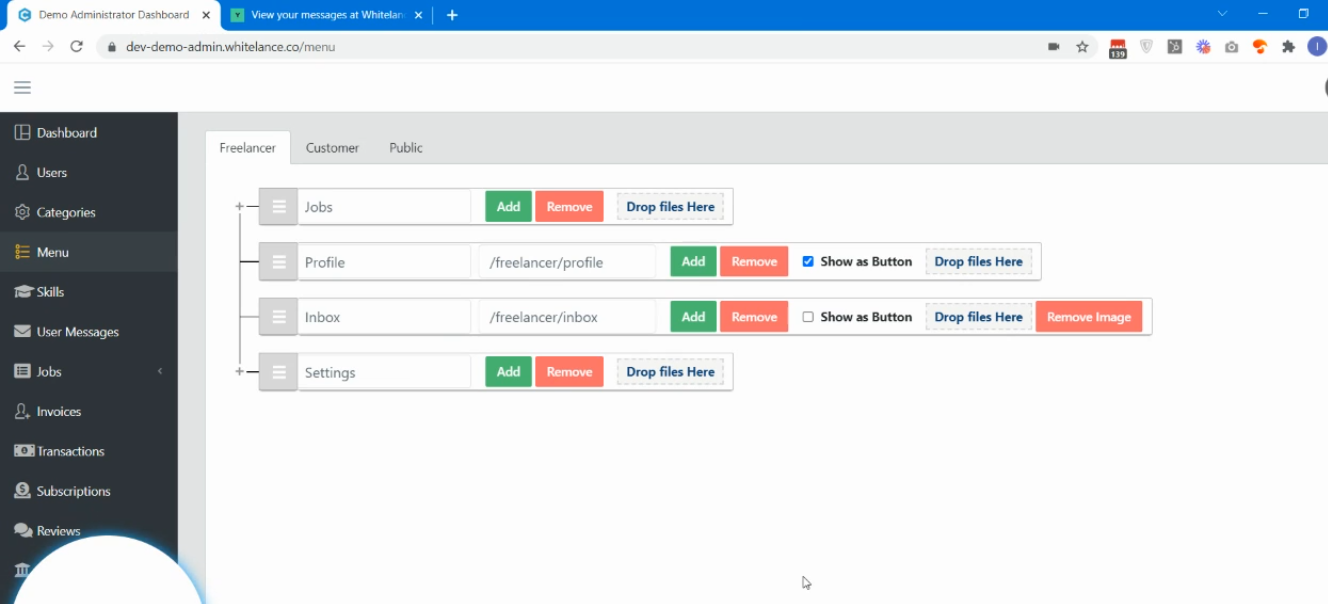
The freelancer’s menu that corresponds to the dashboard above is shown in the image below.

Note the order of the menu items is the same (Jobs>Profile>Inbox>Settings). In the dashboard you can drag and drop each strip to change their order.
The ‘Jobs’ and ‘Settings’ menu items have a standard appearance. The ‘Profile’ button has the ‘Show as button’ option selected, which makes the appearance of the menu item to appear like a button (all menu items are dynamic, so if you hover over them with your mouse they will become shaded).
The ‘Inbox’ menu item text has been replaced by an image that was uploaded onto the admin dashboard. To replace the image with text again, the image must be removed from the admin dashboard.
Any of the menu items can be adapted in any of the ways shown above, and any image can be uploaded to replace the text of each menu item.
Note that the ‘Jobs’ and ‘Settings’ items have a small cross on the dashboard. This shows that there are drop-down menu items on those tabs, which will appear once the + is clicked. A drop-down item can be drag and dropped to become a top-level menu item and the top-level menu items can be drag/dropped to become a drop-down item.
New items can be created by clicking the ‘Add’ button.
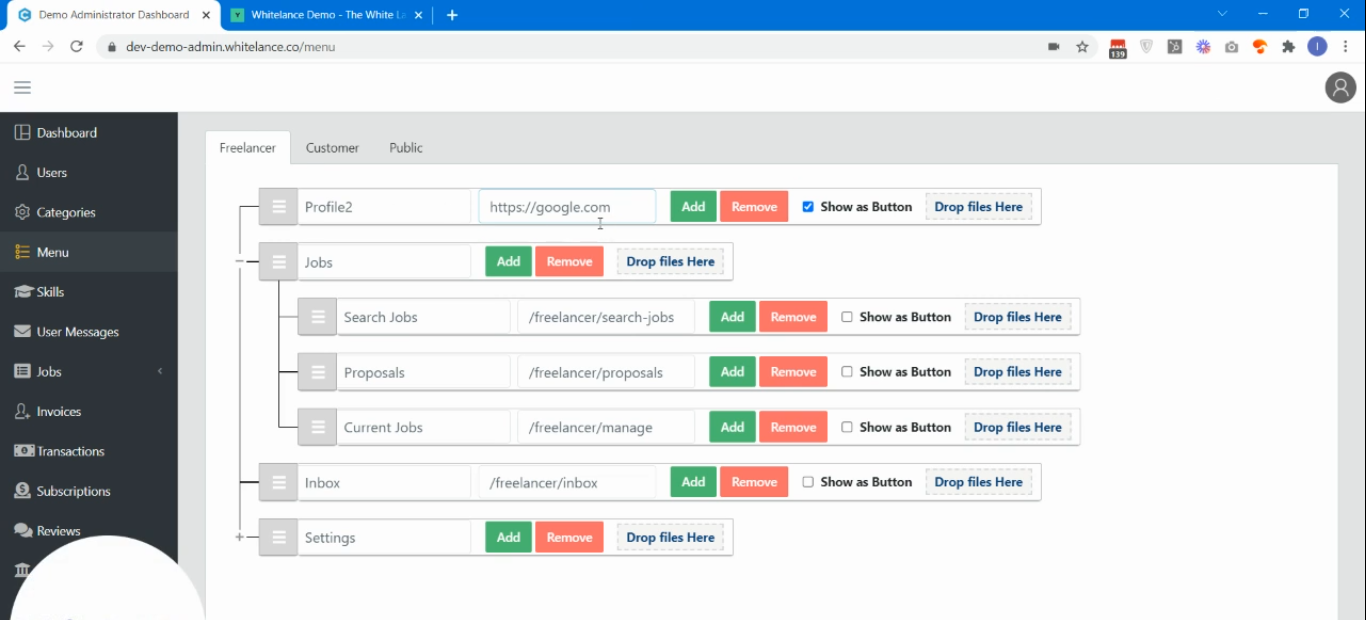
The menu items can be renamed by selecting and typing over the existing text (‘Profile’ was changed to ‘Profile2’ in the image below.
The URL that each item leads to can also be changed by selecting and typing over the tab adjacent to the title. For the profile menu item, the url can be changed from /freelancer/profile to another site such as https://google.com. In this particular case it would change the link from internal to external.

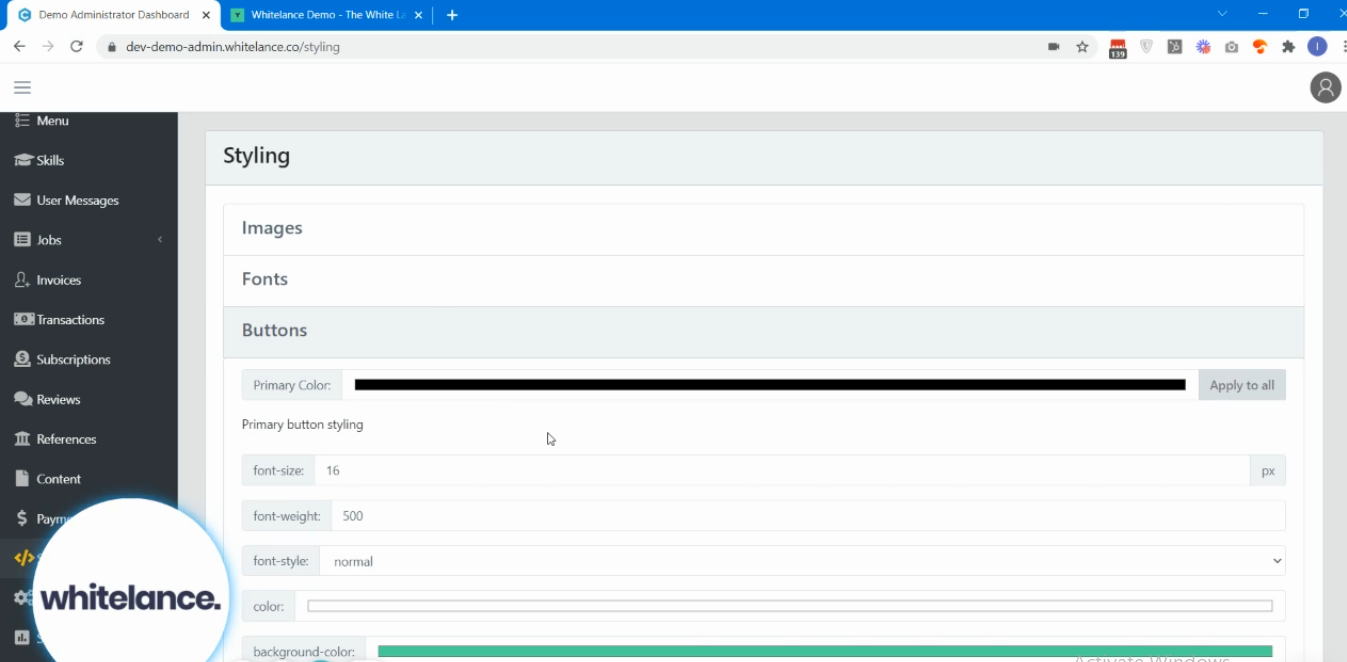
The default menu item and button design can both be changed by navigating to the ‘Styling’ page, selecting ‘Buttons’ and scrolling down to the ‘Menu button Styling’ option. Here you can change the color, size, text of the standard, hover or active states of each button.
