This guide explains the ‘Data Types’ tool, which allows you to create an unlimited number of data sets for your freelancers to tag themselves with, and for customers to add as job requirements. Depending on how many data types correlate, the freelancers will be ranked with a %% match.
Video Guide
Step by Step Guide
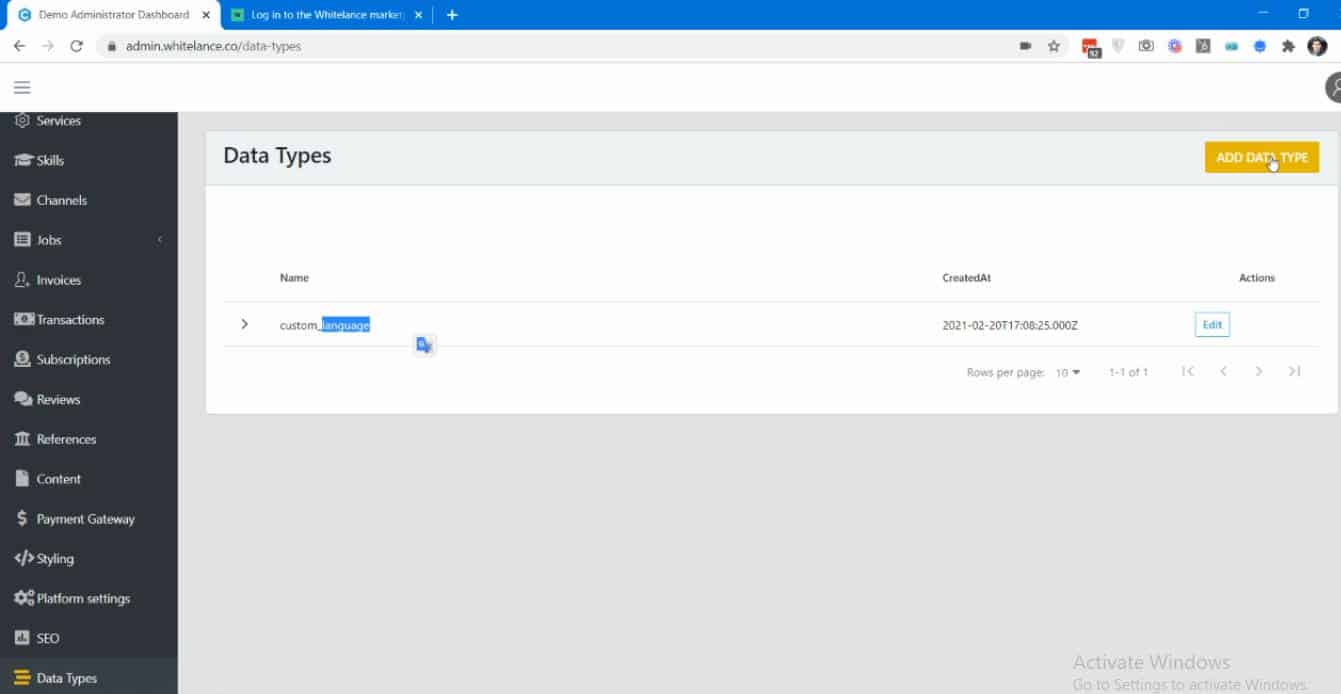
In the admin dashboard under ‘Data Types’ you have the option to create an unlimited number of data sets. To create a data type, select ‘Add Data Type’

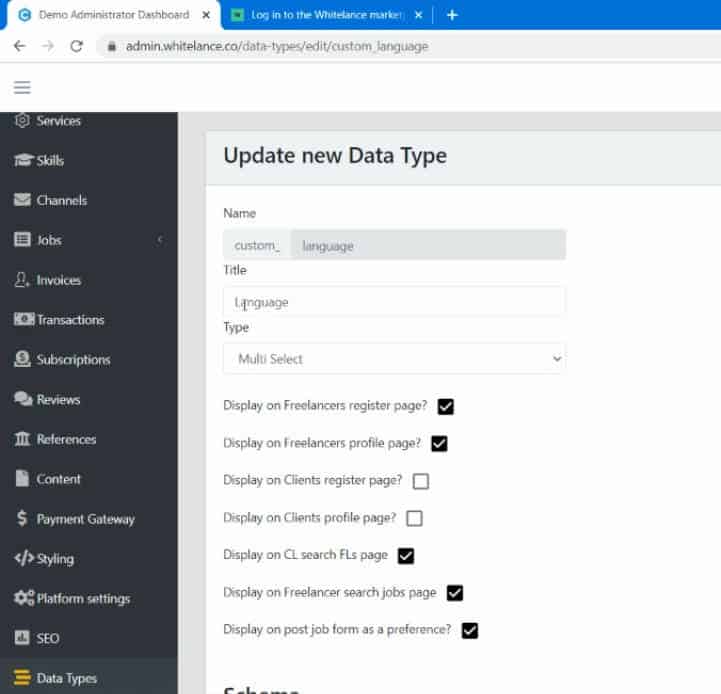
When creating a data type the ‘Name’ is used in the back-end and is not visible to users or freelancers. This field cannot have any spaces- we suggest using this format: Years_of_experience.
The ‘Title’ will appear as a label on the block of each data type.
The ‘Type’ option denotes whether this data type will allow the user to only select one item from the drop-down list (ie years of experience), whether they can choose multiple options (languages they speak), whether the created filed will be a string input, or a file upload.
You can then choose where this data item will appear on your site, and how it will affect the end users. You can choose for it to appear on either the buyer’s or seller’s registration page, on their profile pages, the post job page, within specific sections of the marketplace (such as specific pop-ups, the portfolio window), or the product creation page. You can moreover select whether this is a required input field on several of those pages.

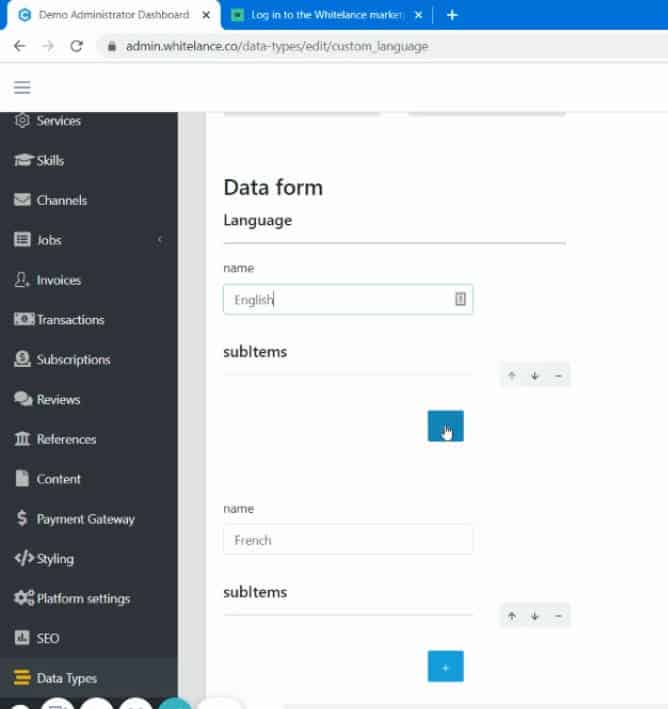
If you are creating a ‘single select’ or ‘multiple select’ custom data list, scroll down to the bottom of the page until the options shown in the following image appear. In this example the data type is for languages, and each ‘name’ field allows you to input another language. A subcategory can also be added to any of the items by clicking the + symbol. In this way under English, your users can also have the option to select British, American, Canadian, Australian etc.

Once you have created a data type (as either a single select or mutiple select option), if you want it to give it a weighting so that it is used to match candidates with jobs, then you must select the options for the data type to appear on both of these options:
‘Display on the Freelancers Profile Page?’
‘Display on Post Job Form as a Preference?’
Depending on the list you have created, you may want a user to score 100% if they match on any item from the list (speaks English OR Spanish), or you may want them to match on every item that was put as a criterion (speaks English AND Spanish). The default option is for the OR logic, whereas if you want to implement the AND logic for the list, you will need to further select ‘Split Weighting’ from the tick box list.
Then you can go to the ‘Settings’ tab on your admin dash and search for this feature: ‘Choose which data items to include within the match score, and what weights to assign them? (Optional)’.

Clicking on the ‘Edit’ option, generates this pop-up, where you can set the weighting for the specific items. Note that the total must sum to 100%. Be sure to click ‘Save’ on both the pop-up and at the bottom of the screen for your preferences to be upheld.

Once a customer has posted their job the candidates will be sorted based on the matching score.

New functionality has been added to the Data Types section. View our guides on: